9 things Windows users should do first when switching to macOS
Switching from Windows to macOS can be a challenging experience.
Even the most passionate among us can have trouble adapting thanks to key differentiators like Apple’s unique design philosophy, the limited and specialized software library, and separate tools for handling day-to-day workflows.
But if you can learn to appreciate the macOS way of doing things rather than try to replicate your Windows workflow verbatim, you may find that there’s more than a few things to enjoy in the new experience.
And it’s easier than ever to make the switch because Apple has been taking pages from Microsoft’s Windows 11 playbook and adding similar features to macOS Sequoia (like window tiling) that will make you feel a little more comfortable.
If you don’t know where to start, this guide to switching from Windows to macOS can set you up with instructions for performing basic tasks like:
- Understanding the key differences between macOS and Windows
- Customizing the macOS user interface
- Mastering the new macOS shortcuts and gestures
- Learning to find and install apps using the App Store
- Backing up your important files and data
- Setting up Windows on your Mac with Boot Camp
Follow along and you’ll be zipping around macOS like a power user before you know it. Ready to get started? Let’s dive in!
macOS vs Windows: What’s the difference?
Windows and macOS are fundamentally different operating systems under the hood. While Windows is based on Microsoft’s proprietary NT kernel, macOS is built on a Unix foundation. This closed architecture is why macOS can only run on Apple’s own Mac hardware, while Windows can be installed on a wide variety of PC configurations from many manufacturers.
The closed nature of macOS allows Apple to tightly integrate the hardware and software for a seamless experience. It also makes macOS much less susceptible to viruses and malware compared to Windows. However, the tradeoff is a more limited selection of software and games compared to the vast and customizable Windows ecosystem.
When you first boot into macOS as a Windows user, be prepared for a shock. Right off the bat, you should notice several key differences in the user experience:
- Instead of the Windows taskbar, macOS has the Dock at the bottom of the screen for launching and switching between apps.
- Mission Control provides an overview of all your open windows, desktops, and full-screen apps — similar to Task View in Windows — but with the ability to also see minimized windows.
- Launchpad gives you a grid of all installed apps, serving as an alternative to the Start Menu.
- Applications in macOS can be closed by clicking the red button, but this doesn’t necessarily quit the app. The menu bar at the top provides an easy way to access each app’s preferences and quit functionality.
- Customization options for application windows are more limited with macOS — you can’t easily snap them to different parts of the screen like in Windows.
While these differences can be jarring at first for long-time Windows users, it doesn’t actually take away from the functionality of the operating system. Apple’s macOS just has a very different way of doing things, which, although confusing at first, is viewed by many as a more intuitive alternative to Windows. The key is to simply dive in and start using your Mac for day-to-day tasks. Over time, navigating the platform will start to feel natural and intuitive.
Learning new shortcuts and gestures

One of the biggest adjustments when switching from Windows to macOS is getting used to the different keyboard shortcuts and trackpad gestures. Many common shortcuts like copy (Ctrl+C), paste (Ctrl+V), and save (Ctrl+S) use the Command (⌘) key on macOS instead of Control. The Alt key in Windows is also called Option on Mac keyboards.
Additionally, macOS leverages a multi-touch trackpad for navigation and actions. Because of this, gestures like swiping up with three fingers to open Mission Control or pinching with thumb and three fingers to open Launchpad have no equivalent in Windows.
Here are some common macOS keyboard shortcuts that will come in handy:
- ⌘ + C: Copy
- ⌘ + V: Paste
- ⌘ + S: Save
- ⌘ + Q: Quit application
- ⌘ + Tab: Switch between open applications
- ⌘ + Space: Open Spotlight search
- ⌘ + ,: Open application preferences
- ⌘ + Shift + 3: Take full screenshot
- ⌘ + Shift + 4: Take partial screenshot
If you own a MacBook or have a Magic Trackpad, you also have access to a slew of time-saving gestures you can use to navigate macOS more quickly via that trackpad. Here are some useful trackpad gestures to learn:
- Swipe up with 3 fingers: Open Mission Control to see all open windows
- Swipe down with 3 fingers: Open App Exposé to show all open windows of current app
- Pinch with thumb and 3 fingers: Open Launchpad to see all installed apps
- Spread thumb and 3 fingers: Show Desktop
- Swipe left/right with 2 fingers: Swipe between pages in a browser or PDF
While it takes some time to build muscle memory, learning these core macOS shortcuts and gestures will greatly enhance your productivity. You can remap modifier keys in System Settings if you want to more closely match the Windows layout, but it’s generally recommended to adapt to the Mac way if possible.
Customizing the UI with System Settings
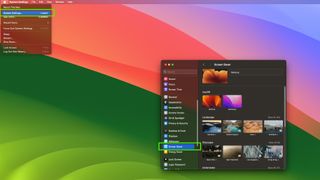
macOS has a distinct design language compared to Windows, favoring a more minimalist look with translucent menu bars, flat icons, and restrained use of color. However, the System Settings app (called System Preferences in older macOS versions) provides a centralized place to customize various aspects of the UI to your liking.
Some key UI customizations you can make in macOS:
- Appearance: Switch between Light and Dark modes or enable Auto mode to change based on time of day
- Accent Color: Choose a color for buttons, menus, and windows
- Highlight Color: Pick a color for text selection highlights
- Desktop Picture: Select a static or dynamic desktop wallpaper
- Screen Saver: Configure a screen saver with options like a sliding photo gallery
- Dock: Change the Dock’s position, size, and magnification level
- Menu Bar: Toggle menu bar icons and choose clock format
- Default web browser: Set your preferred web browser
- Notifications: Customize notifications on a per-app basis
- Mission Control: Specify Hot Corners actions and Mission Control keyboard shortcuts
To access these options, simply click the System Settings icon in the Dock (it looks like a gear) or select > System Settings. The various settings categories are listed in the sidebar on the left.
In addition to System Settings, right-clicking on the Desktop itself provides quick access to options for changing the wallpaper, screen resolution, and color profile. Don’t be afraid to explore and experiment — most customizations can easily be reverted.
While macOS may not offer the same granular customization as Windows, thoughtfully adjusting the built-in UI options can go a long way in making your Mac feel like home. The key is finding a setup that complements your workflow while maintaining the design coherence that macOS is known for.
Mastering the use of Spotlight Search
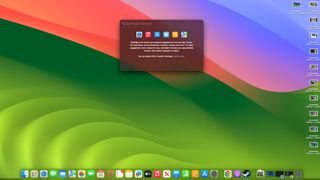
Spotlight is a powerful system-wide search feature in macOS that allows you to quickly find files, applications, documents, emails, contacts, and more. It indexes the contents of your Mac’s hard drive to make searching fast and efficient.
With a bit of practice, Spotlight will become an indispensable tool for quickly accessing anything on your Mac. To access Spotlight Search, either click on the magnifying glass in the top-right corner of your screen or press the ⌘ + Space keyboard shortcut.
Some useful things you can do with Spotlight:
- Search for an app by typing the first few letters of its name and then press Enter to launch it.
- Perform quick calculations and unit conversions by typing them directly into Spotlight.
- Use Spotlight to look up word definitions and get quick weather forecasts.
- Customize Spotlight’s search results in System Settings > Siri & Spotlight to optimize it for your needs.
- Exclude sensitive locations from Spotlight searches in System Settings > Siri & Spotlight > Spotlight Privacy.
Getting started with Spotlight is very simple. Just follow these steps:
- Click the magnifying glass icon in the top-right corner of the menu bar, or press ⌘ + Space.
- Start typing your search query. Spotlight will display relevant results as you type.
- Use the arrow keys to navigate the results list and press Enter to open a selected item.
Getting familiar with the file manager
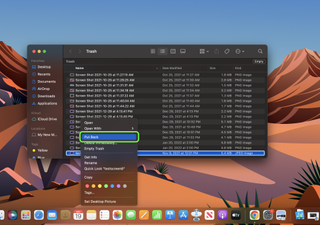
Finder is the default file manager in macOS. It provides a graphical interface for organizing and navigating the files and folders on your Mac, similar to File Explorer on Windows.
But unlike File Explorer, Finder uses a single-window interface with back/forward buttons and tabs, similar to a web browser. A sidebar provides convenient access to frequently-used locations like the Desktop, Documents, Downloads, and iCloud Drive.
By taking some time to learn the Finder’s unique features and implementing a logical file organization system, you’ll feel right at home managing your files on macOS. Here are some tips to get started with:
- Avoid clutter by minimizing the files you store on the Desktop. Use the Documents folder or iCloud Drive instead.
- Use descriptive names for files and folders to make them easy to find via search.
- Take advantage of Finder tags to categorize files in multiple ways.
- Use Stacks on the Desktop to automatically group related files into collapsible piles.
- Set up Smart Folders to automatically collect files meeting certain criteria, like all image files or documents created in the last week.
- Remove old and duplicate files periodically to free up space and reduce clutter.
Understanding the App Store
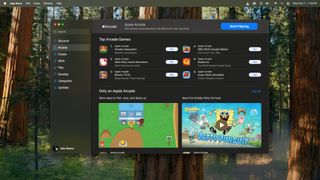
Apple’s App Store is the central hub for downloading and installing applications on macOS. It provides a curated selection of apps that have been reviewed and approved by Apple, ensuring they meet certain standards for quality, security, and compatibility. Using the App Store is the safest and most straightforward way to get new software on your Mac.
When you download an app, the App Store automatically puts it in your Applications folder and adds it to Launchpad for easy access. It also periodically checks for updates and notifies you when they’re available, so you can be sure you always have the latest version with the newest features and bug fixes. While it’s possible to download apps from the web outside the App Store, it opens up more risk of accidentally getting malware or buggy unauthorized software
To use the App Store, simply open the app from your Dock or Applications folder. You can browse featured apps or use the search bar to find something specific. Clicking on an app brings you to its product page with screenshots, reviews, and a description. If the app is paid, you’ll see the price on the buy button. Simply click “Get” to start the download and provide your Apple ID credentials to complete the purchase. The app will then download and install automatically.
Setting up backups with Time Machine
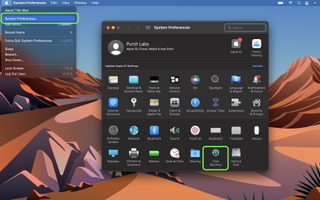
Time Machine is the built-in backup solution in macOS. It automatically keeps an up-to-date copy of all your files, apps, and system settings on an external drive. In the event of data loss or hardware failure, you can restore your entire system to a previous state using your backups.
Time Machine captures hourly backups for the past 24 hours, daily backups for the past month, and weekly backups for previous months, as space allows on your backup drive. It also works silently in the background, so you don’t need to worry about starting or scheduling backups yourself.
To set up Time Machine for the first time, follow these steps:
- Connect an external drive to your Mac. This can be a USB, Thunderbolt, or network drive.
- Open System Settings and navigate to the Time Machine section.
- Click “Select Backup Disk” and choose the drive you want to use for backups.
- Check the “Show Time Machine in menu bar” option so you can quickly check backup status and access settings.
- Time Machine will perform an initial backup of your entire system, which may take several hours depending on how many files you have.
After the initial backup, Time Machine will create incremental backups of only the files that have changed each hour, greatly reducing the time and space required. You can continue using your Mac normally while backups are underway.
If you ever need to restore from a backup, simply restart your Mac and hold Command+R to enter Recovery mode. From there, you can access the Time Machine restore option and choose the backup you want to use. Your system will be restored exactly as it was at that point in time.
Storing, managing, and sharing data with iCloud

iCloud is Apple’s cloud storage and computing service that allows you to seamlessly store, sync, and access your data across all your Apple devices. It comes with 5GB of free storage, with additional paid tiers for those needing more space.
By taking advantage of iCloud integration, you can ensure your important data is backed up and accessible across all your Apple devices. Just be mindful of your storage limits to avoid paying for more than you need. To set up iCloud on your Mac:
- Click the Apple menu > System Settings.
- Sign in with your Apple ID at the top of the sidebar.
- Click your name, then iCloud.
- Choose the apps and features you want to use with iCloud, such as Photos, Mail, Contacts, iCloud Drive, etc.
Taking advantage of pre-installed apps

Every new Mac comes with a suite of useful Apple apps pre-installed, covering productivity, creativity, communication and more. While you can find alternatives, these apps are designed to work seamlessly with macOS and each other. Here’s an overview of some key built-in apps:
- iWork (Pages, Numbers, Keynote): Apple’s version of Microsoft Office, with a word processor, spreadsheet editor, and presentation software. Offers real-time collaboration, modern designs, and Apple Pencil support on iPad. Can open and export Office file formats too.
- Photos: Organizes and syncs your photo and video library across devices. Includes powerful editing tools and artificial intelligence for automatically creating slideshows. You can order prints, photo books, and more right from the app.
- iMovie: Easy-to-use video editor for creating movies and trailers. Offers a library of pre-made templates, transitions, titles and effects. Integrates with Photos, iTunes and GarageBand. More limited than pro tools like Final Cut Pro, but great for beginners.
- GarageBand: A full-featured music creation studio with a sound library of instruments and loops. It can record and edit multiple tracks, then share your songs. Fun and intuitive for novices, but also used by many professionals.
- Maps: Apple’s alternative to Google Maps, with features like offline maps, indoor maps, EV routing, and AR walking directions. Focuses on privacy by not associating data with your Apple ID.
- Notes & Reminders: Simple apps for jotting down quick thoughts, lists and to-dos. Support checklists, tables, attachments, and folder organization. Seamlessly sync between iPhone, iPad and Mac.
- Messages & FaceTime: Apple’s instant messaging and video calling platforms. Tightly integrated with iOS/macOS for features like Memoji, screen sharing, and end-to-end encryption. Only works with other Apple devices.
While third-party apps from the App Store can replace many of these built-in apps, the pre-installed package offers a solid starting point for any new user switching from Windows to macOS. If you’re feeling particularly brave, you can also browse the web for unofficial third-party apps that might offer even more features and functionality.
Switching between macOS and Windows
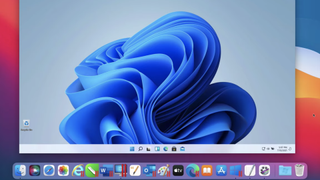
If you find yourself missing certain Windows functionality or needing to run Windows-only software, you have the option to install Windows on your Mac and switch between the two operating systems. This is known as dual-booting.
There are two main ways to set up a dual-boot environment on your Mac:
- Boot Camp (Intel Macs only): Boot Camp is a built-in utility on Intel-based Macs that allows you to partition your hard drive and install Windows alongside macOS. When you turn on your Mac, you can choose to boot into either macOS or Windows. However, you can only run one operating system at a time and must reboot to switch between them.
- Parallels Desktop (Intel and Apple Silicon Macs): Parallels Desktop is a third-party virtualization software that allows you to run Windows and macOS side-by-side without rebooting. You can run Windows apps in a window on your Mac desktop or in full-screen mode. Parallels provides a more seamless experience but requires purchasing a license.
For detailed instructions on how to set up a dual-boot environment with either method, check out our comprehensive guide on how to dual-boot Windows 11 on a Mac. This guide walks you through the step-by-step process for both Boot Camp and Parallels Desktop, including system requirements, necessary software, and best practices.
If you do set up dual-booting, take the time to customize each environment to your liking and learn the key differences in navigation and shortcuts. With a bit of practice, you’ll be able to smoothly transition between macOS and Windows to take full advantage of both operating systems on your Mac.
Now we’ve come full circle, and if you’ve followed through with all of the above suggestions you should be comfortably able to switch between macOS and Windows without breaking a sweat.
For more advice on simple tricks you can use to be productive with your Mac, check out our step-by-step guides to how to select multiple files on Mac and how to rename multiple files on Mac, or how to clear cache on Mac if things are feeling a little sluggish on your MacBook.
More from Tom’s Guide
link


