
Build a PXE server from your old PC with iVentoy

Setting up a new operating system can be a thrilling experience, especially if you’re a distro hopper addicted to trying out new Linux distributions. But before you can get cracking with your new OS, you’ll have to go through the tedious process of creating a bootable USB drive.
Thankfully, a Preboot Execution Environment (PXE) server can simplify this process by letting you boot from a central ISO repository over the local network. If you’ve got a spare system with an Ethernet port, you can convert it into a PXE server using iVentoy.
Deploying the PXE server
iVentoy is compatible with Windows 11 and Linux, so you’re free to choose either OS for the PXE server. Once you’re ready, you can follow these steps to set up iVentoy:
- Head to the official iVentoy GitHub repository and download the archived package compatible with your OS.
-
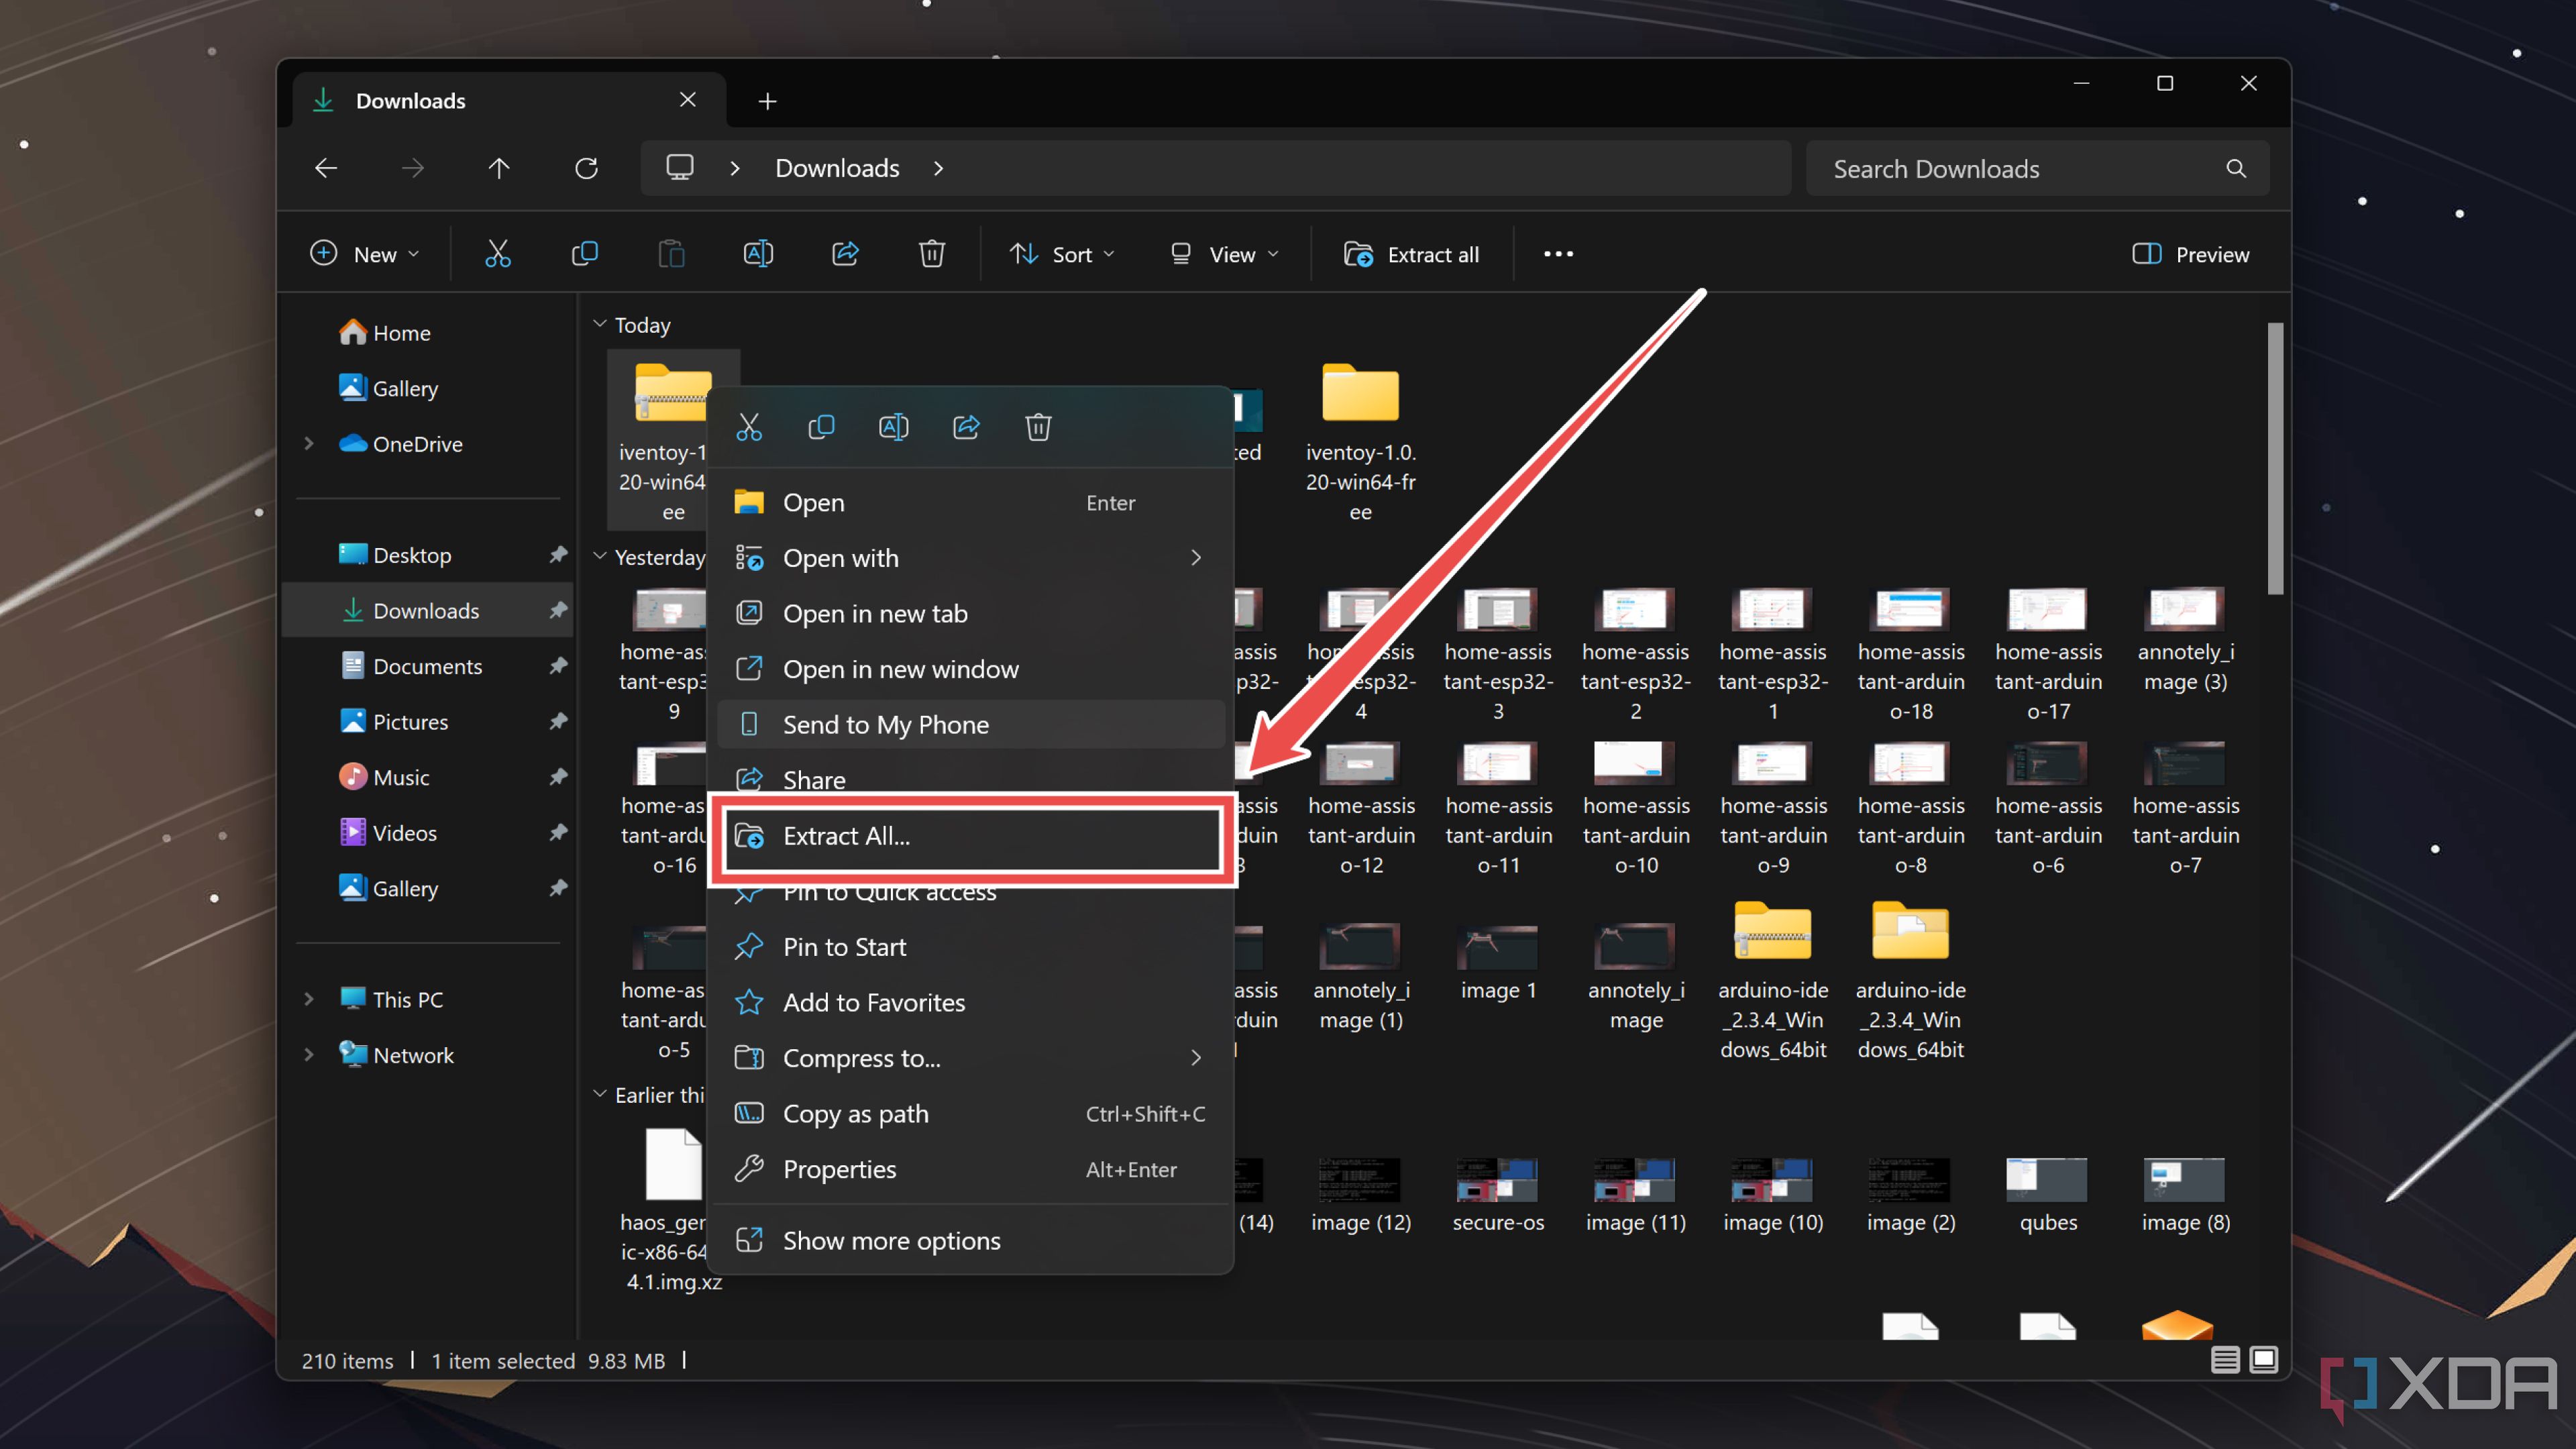
Extract the iventoy.zip folder.
-
If you’re on Linux, you can launch the terminal inside the directory where you downloaded the iventoy.tar.gz file and extract it with this command:
tar -xvzf iventoy-version-linux-free.tar.gz
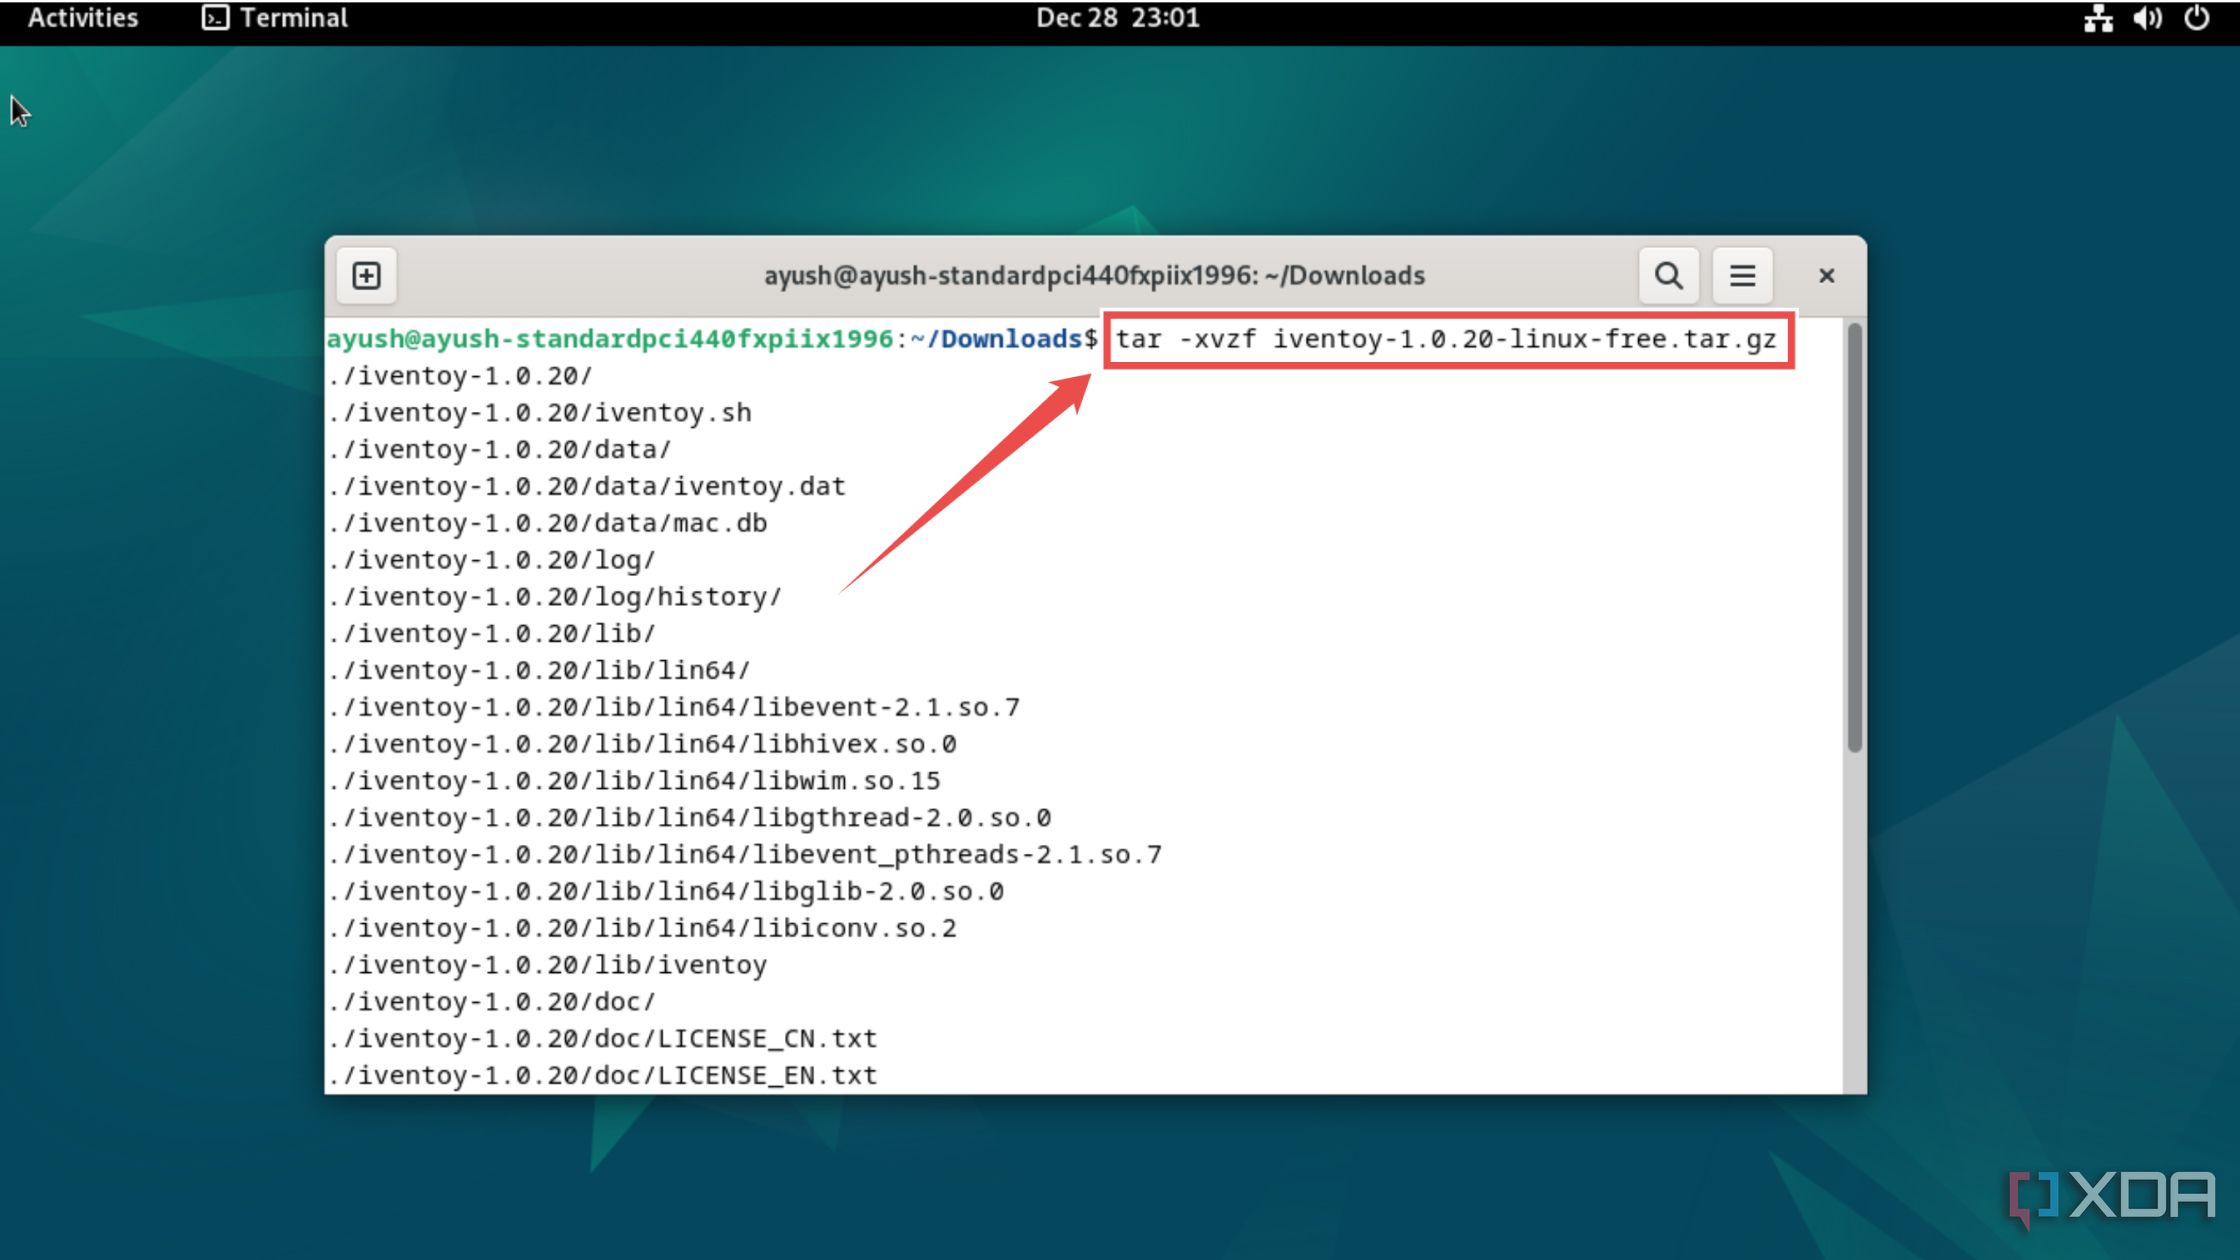
Be sure to replace the version string with the version number of iVentoy.
-
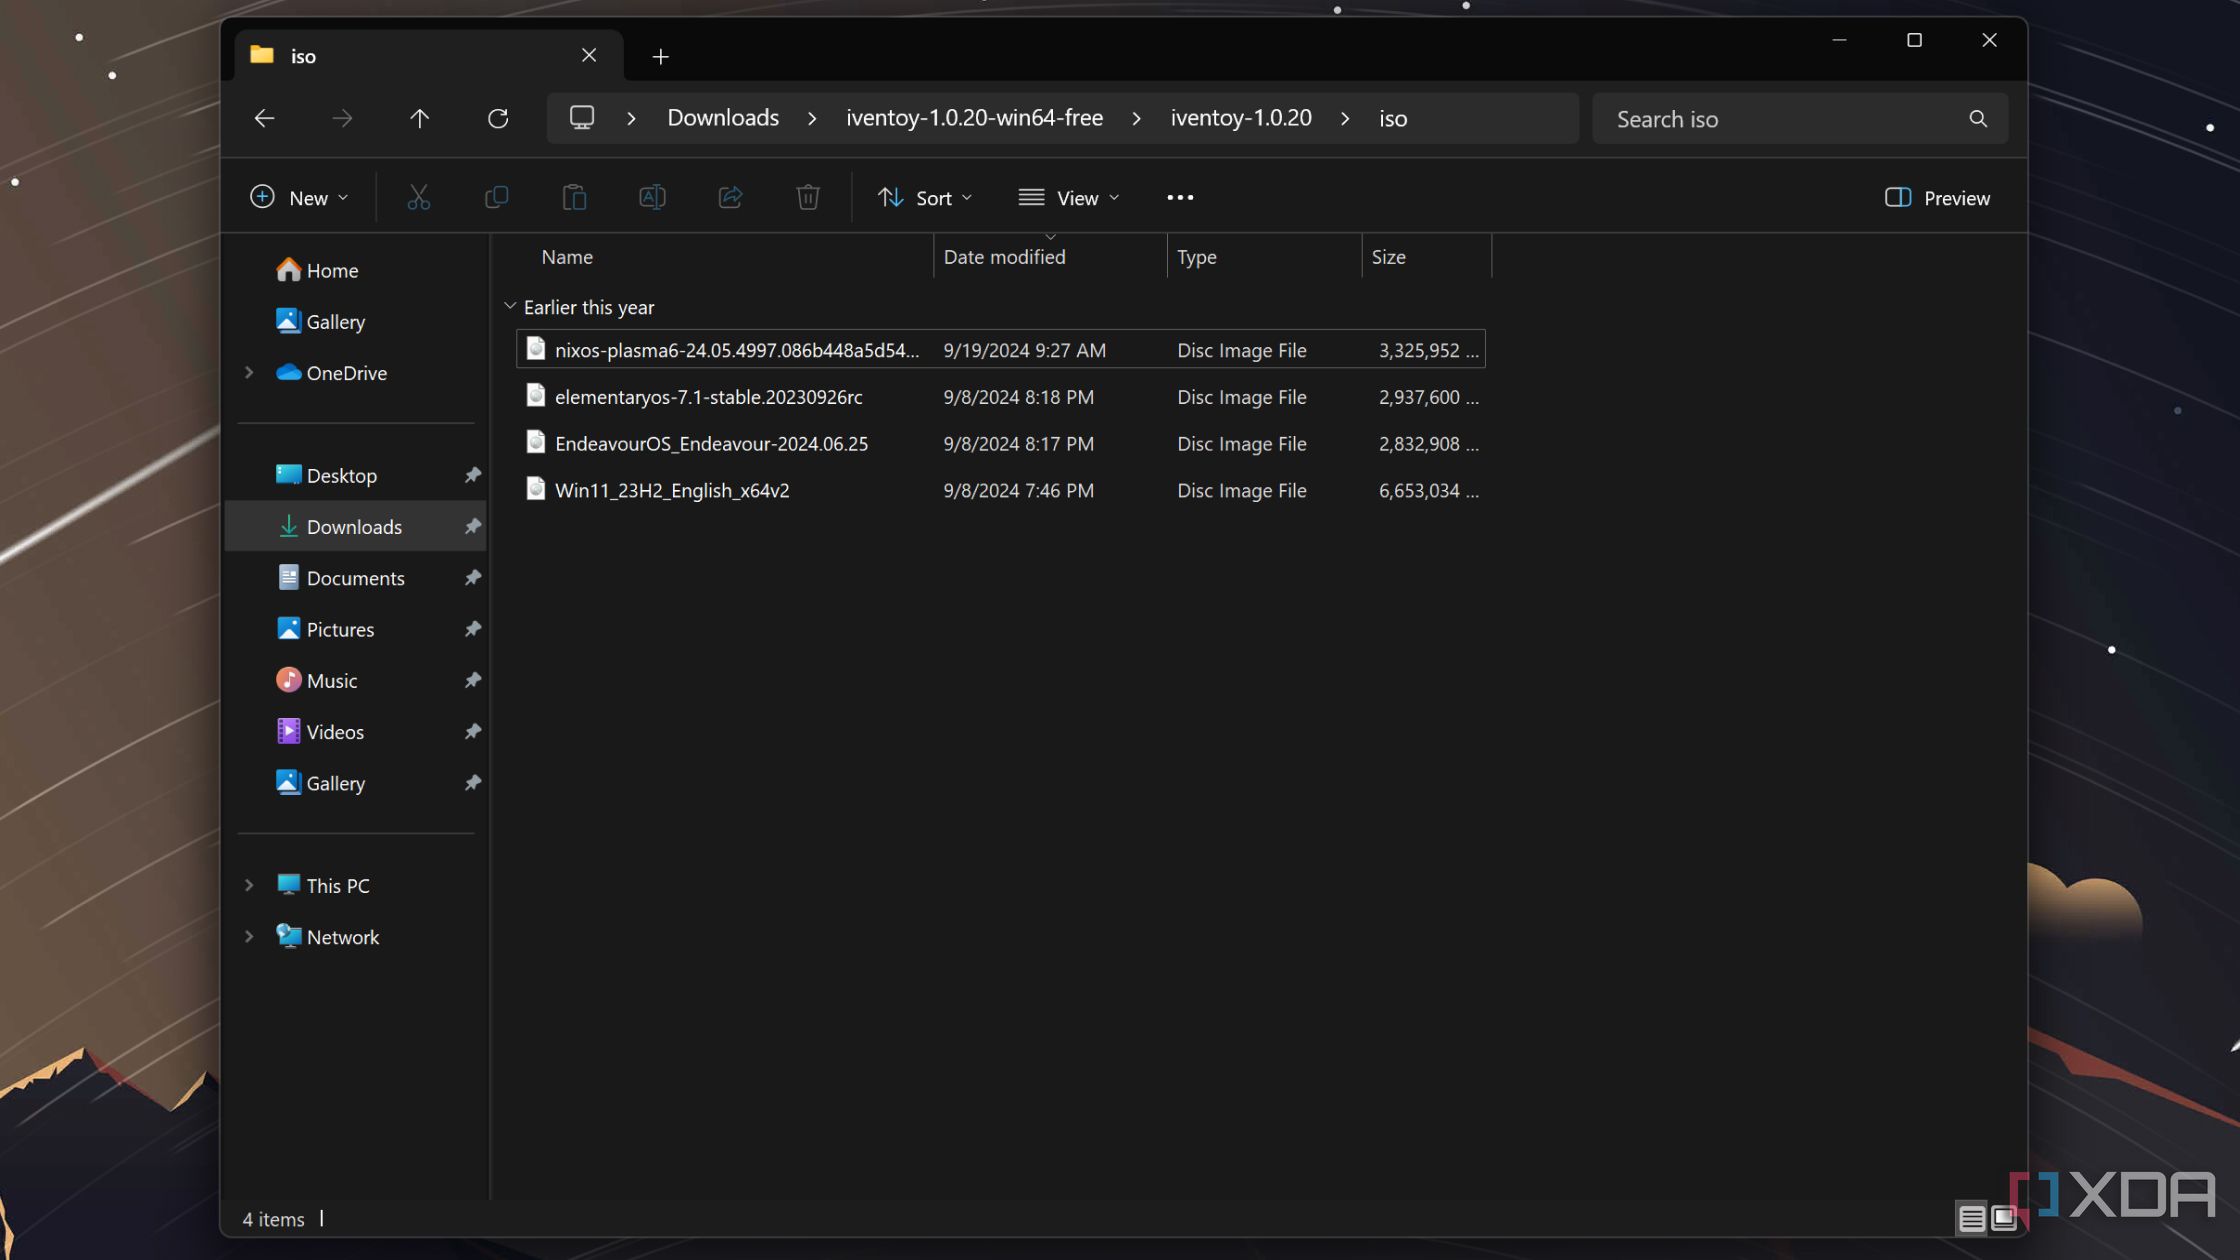
Paste the ISO files you want to access via the PXE server within the iso folder.
-
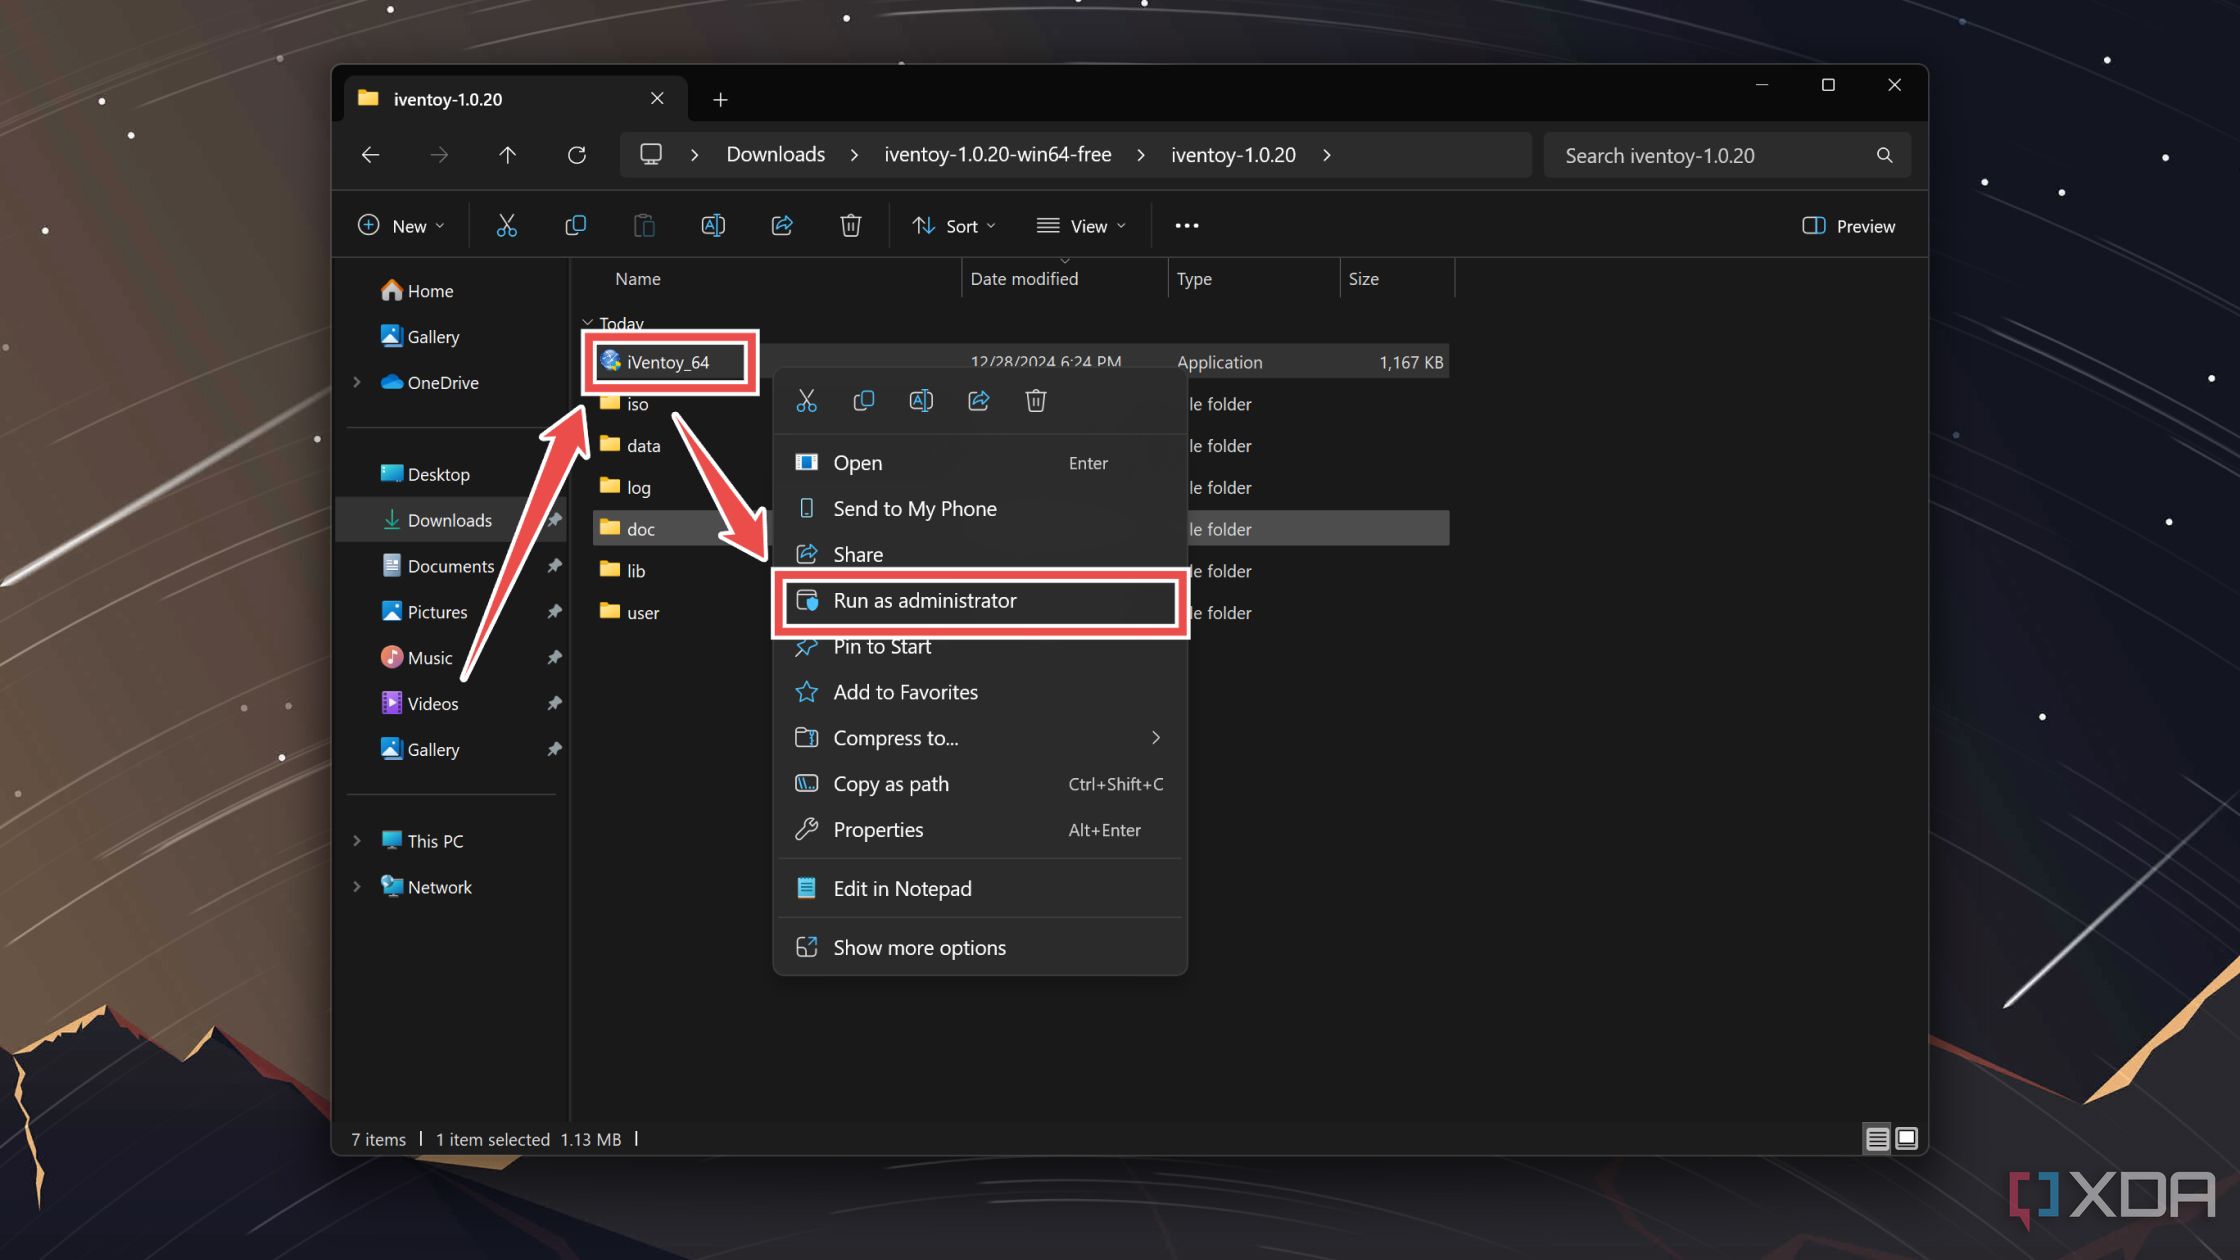
Run iventoy.exe with administrative privileges.
-
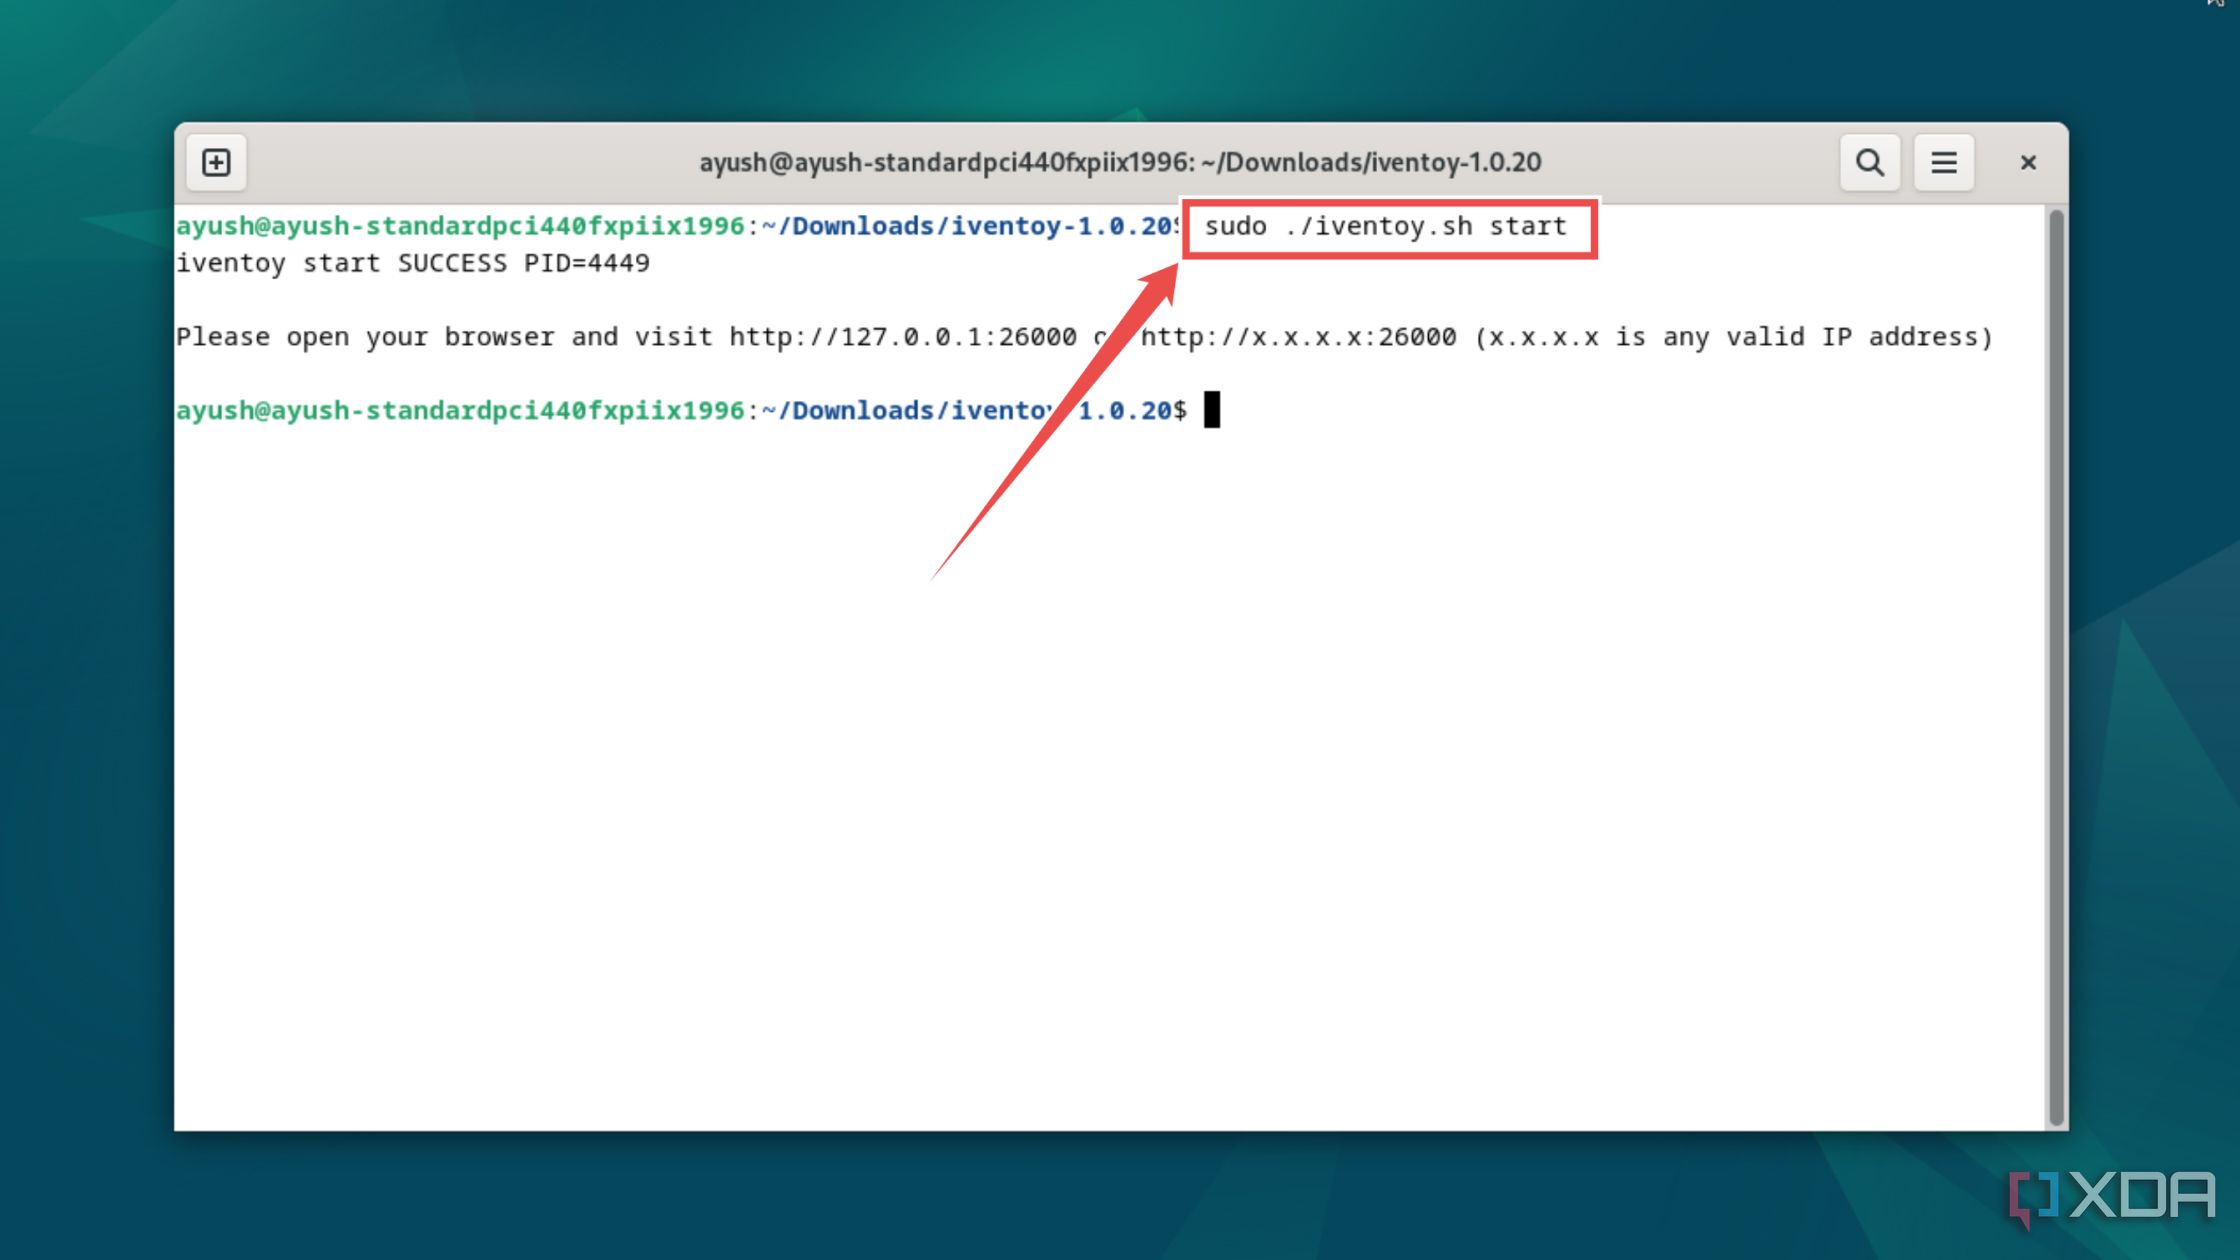
Linux users can run the iventoy.sh script with the following command:
sudo ./iventoy.sh start
- Agree to let iVentoy access your home network when the firewall attempts to block the tool.
-
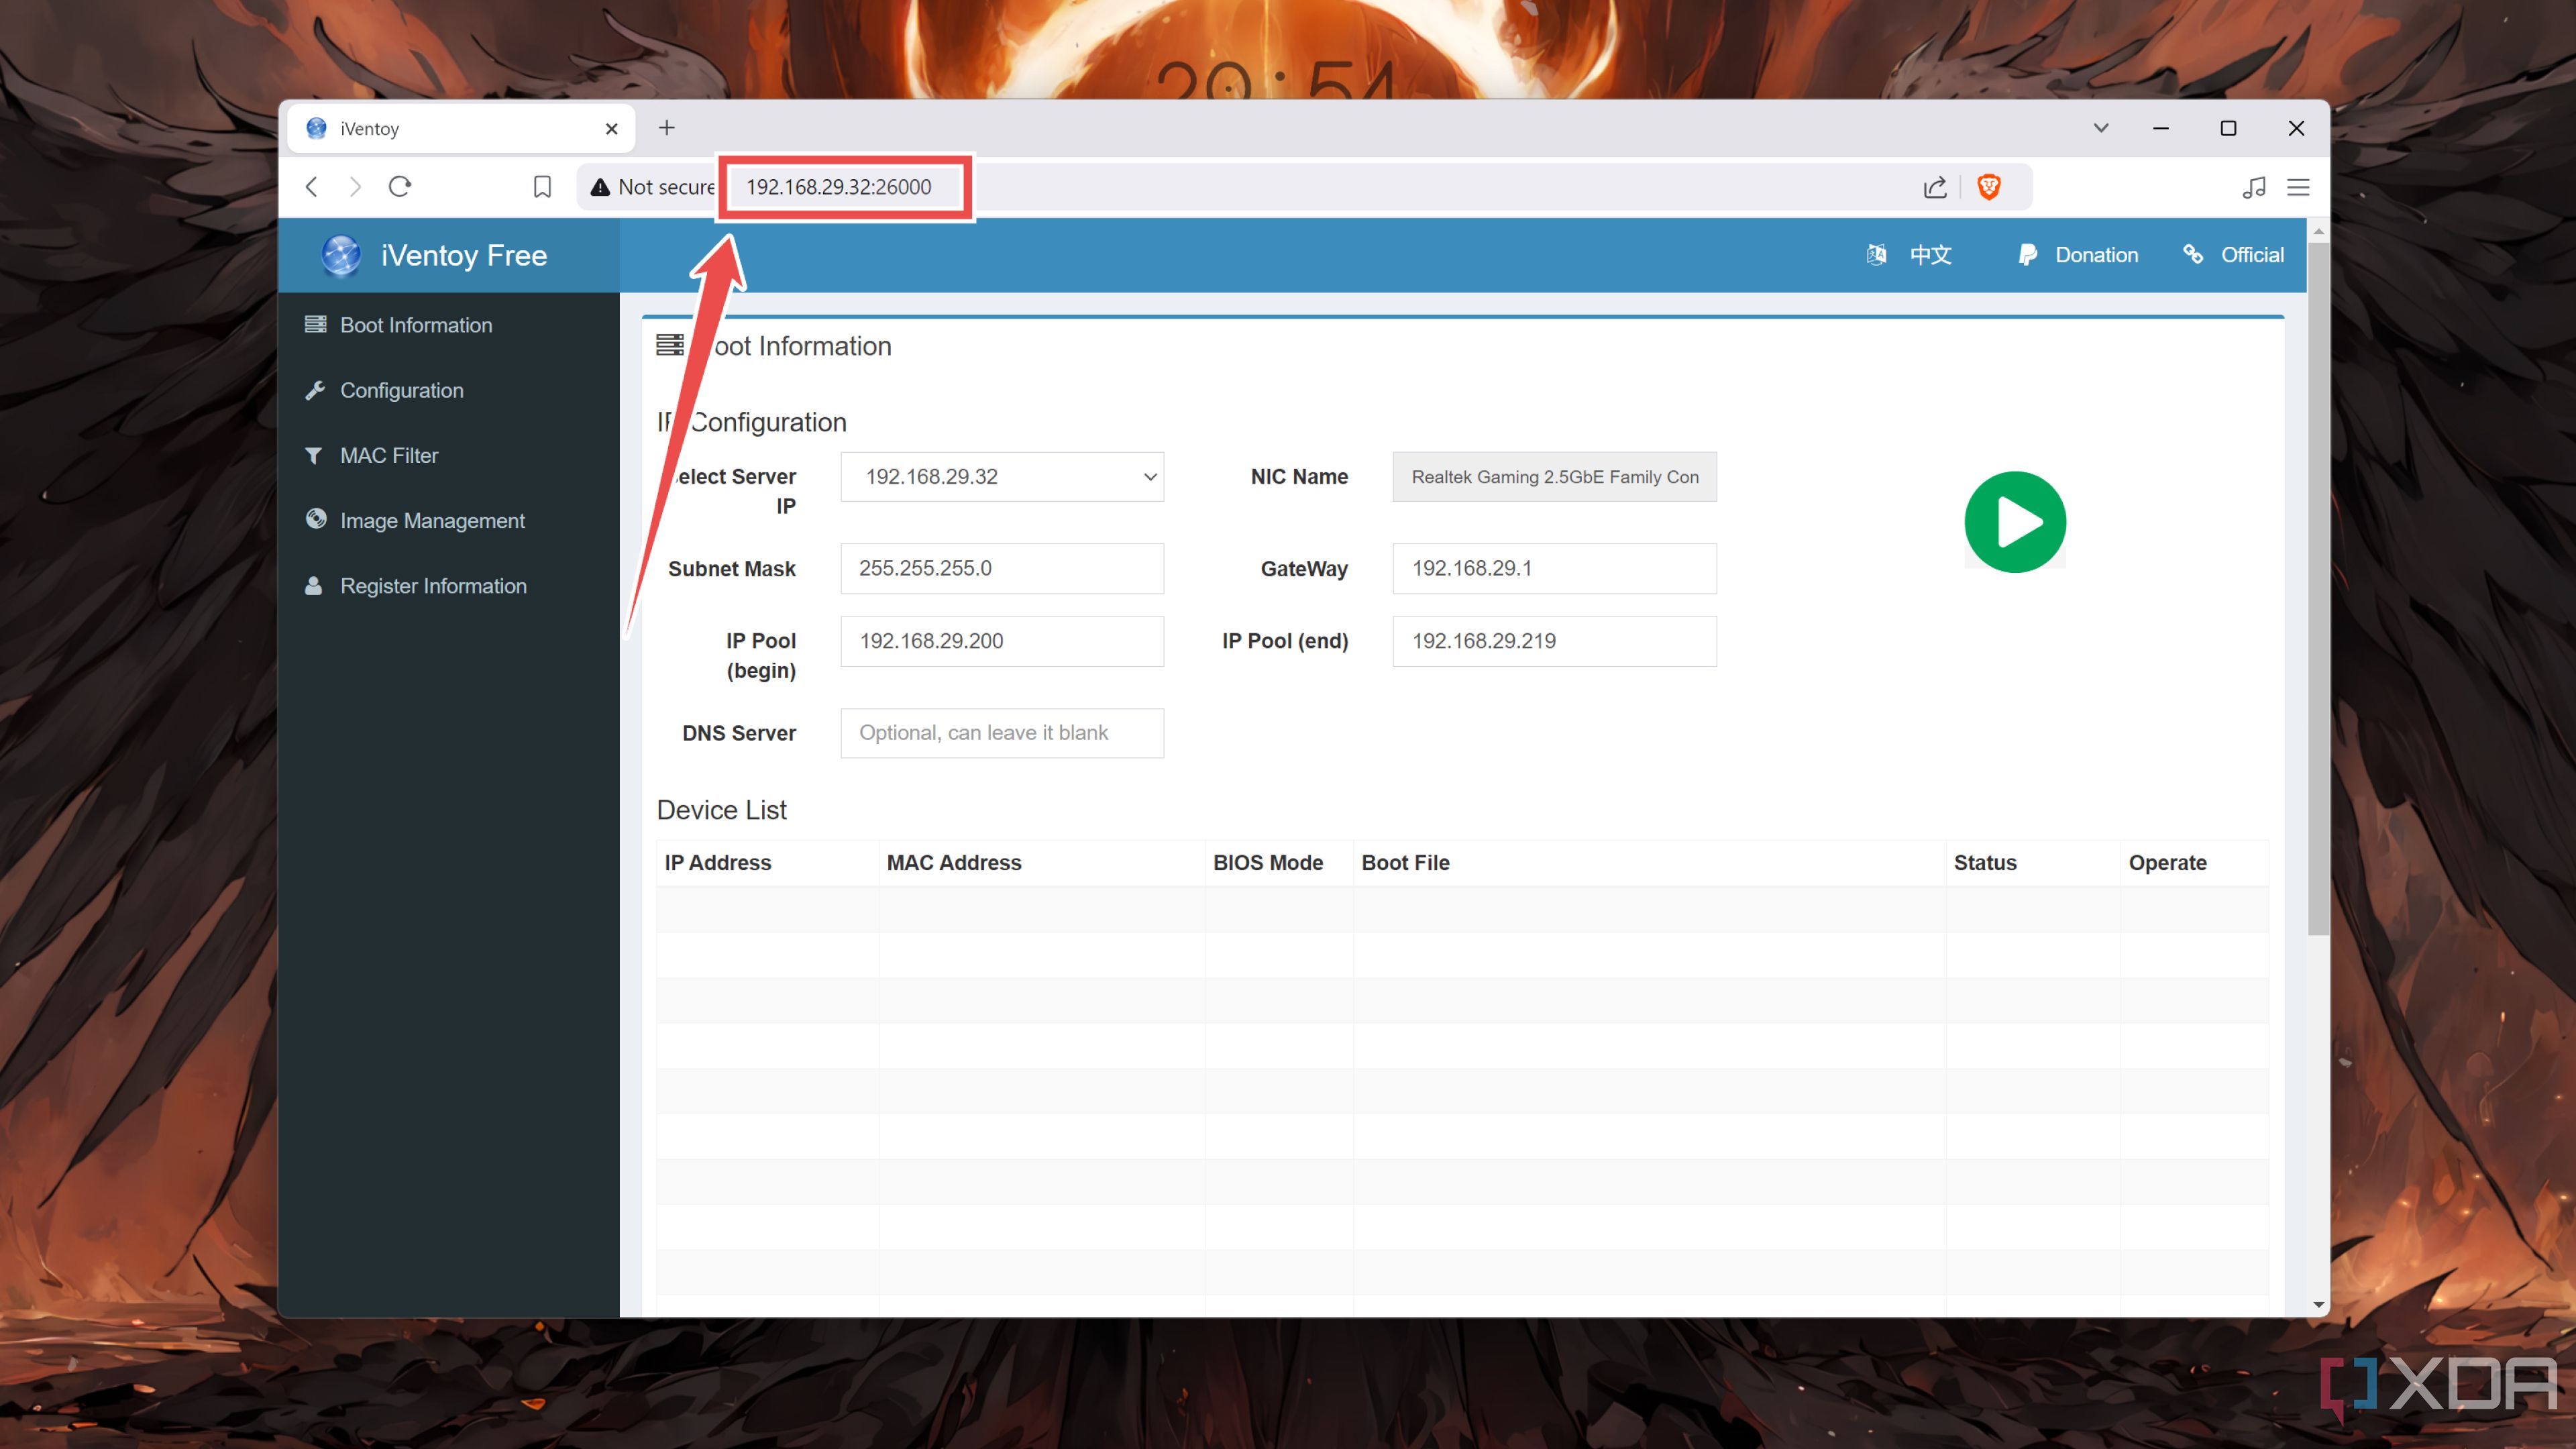
To access the web UI, you can type the PC’s IP address followed by a colon (:) and the port number 26000 into your favorite browser.
-
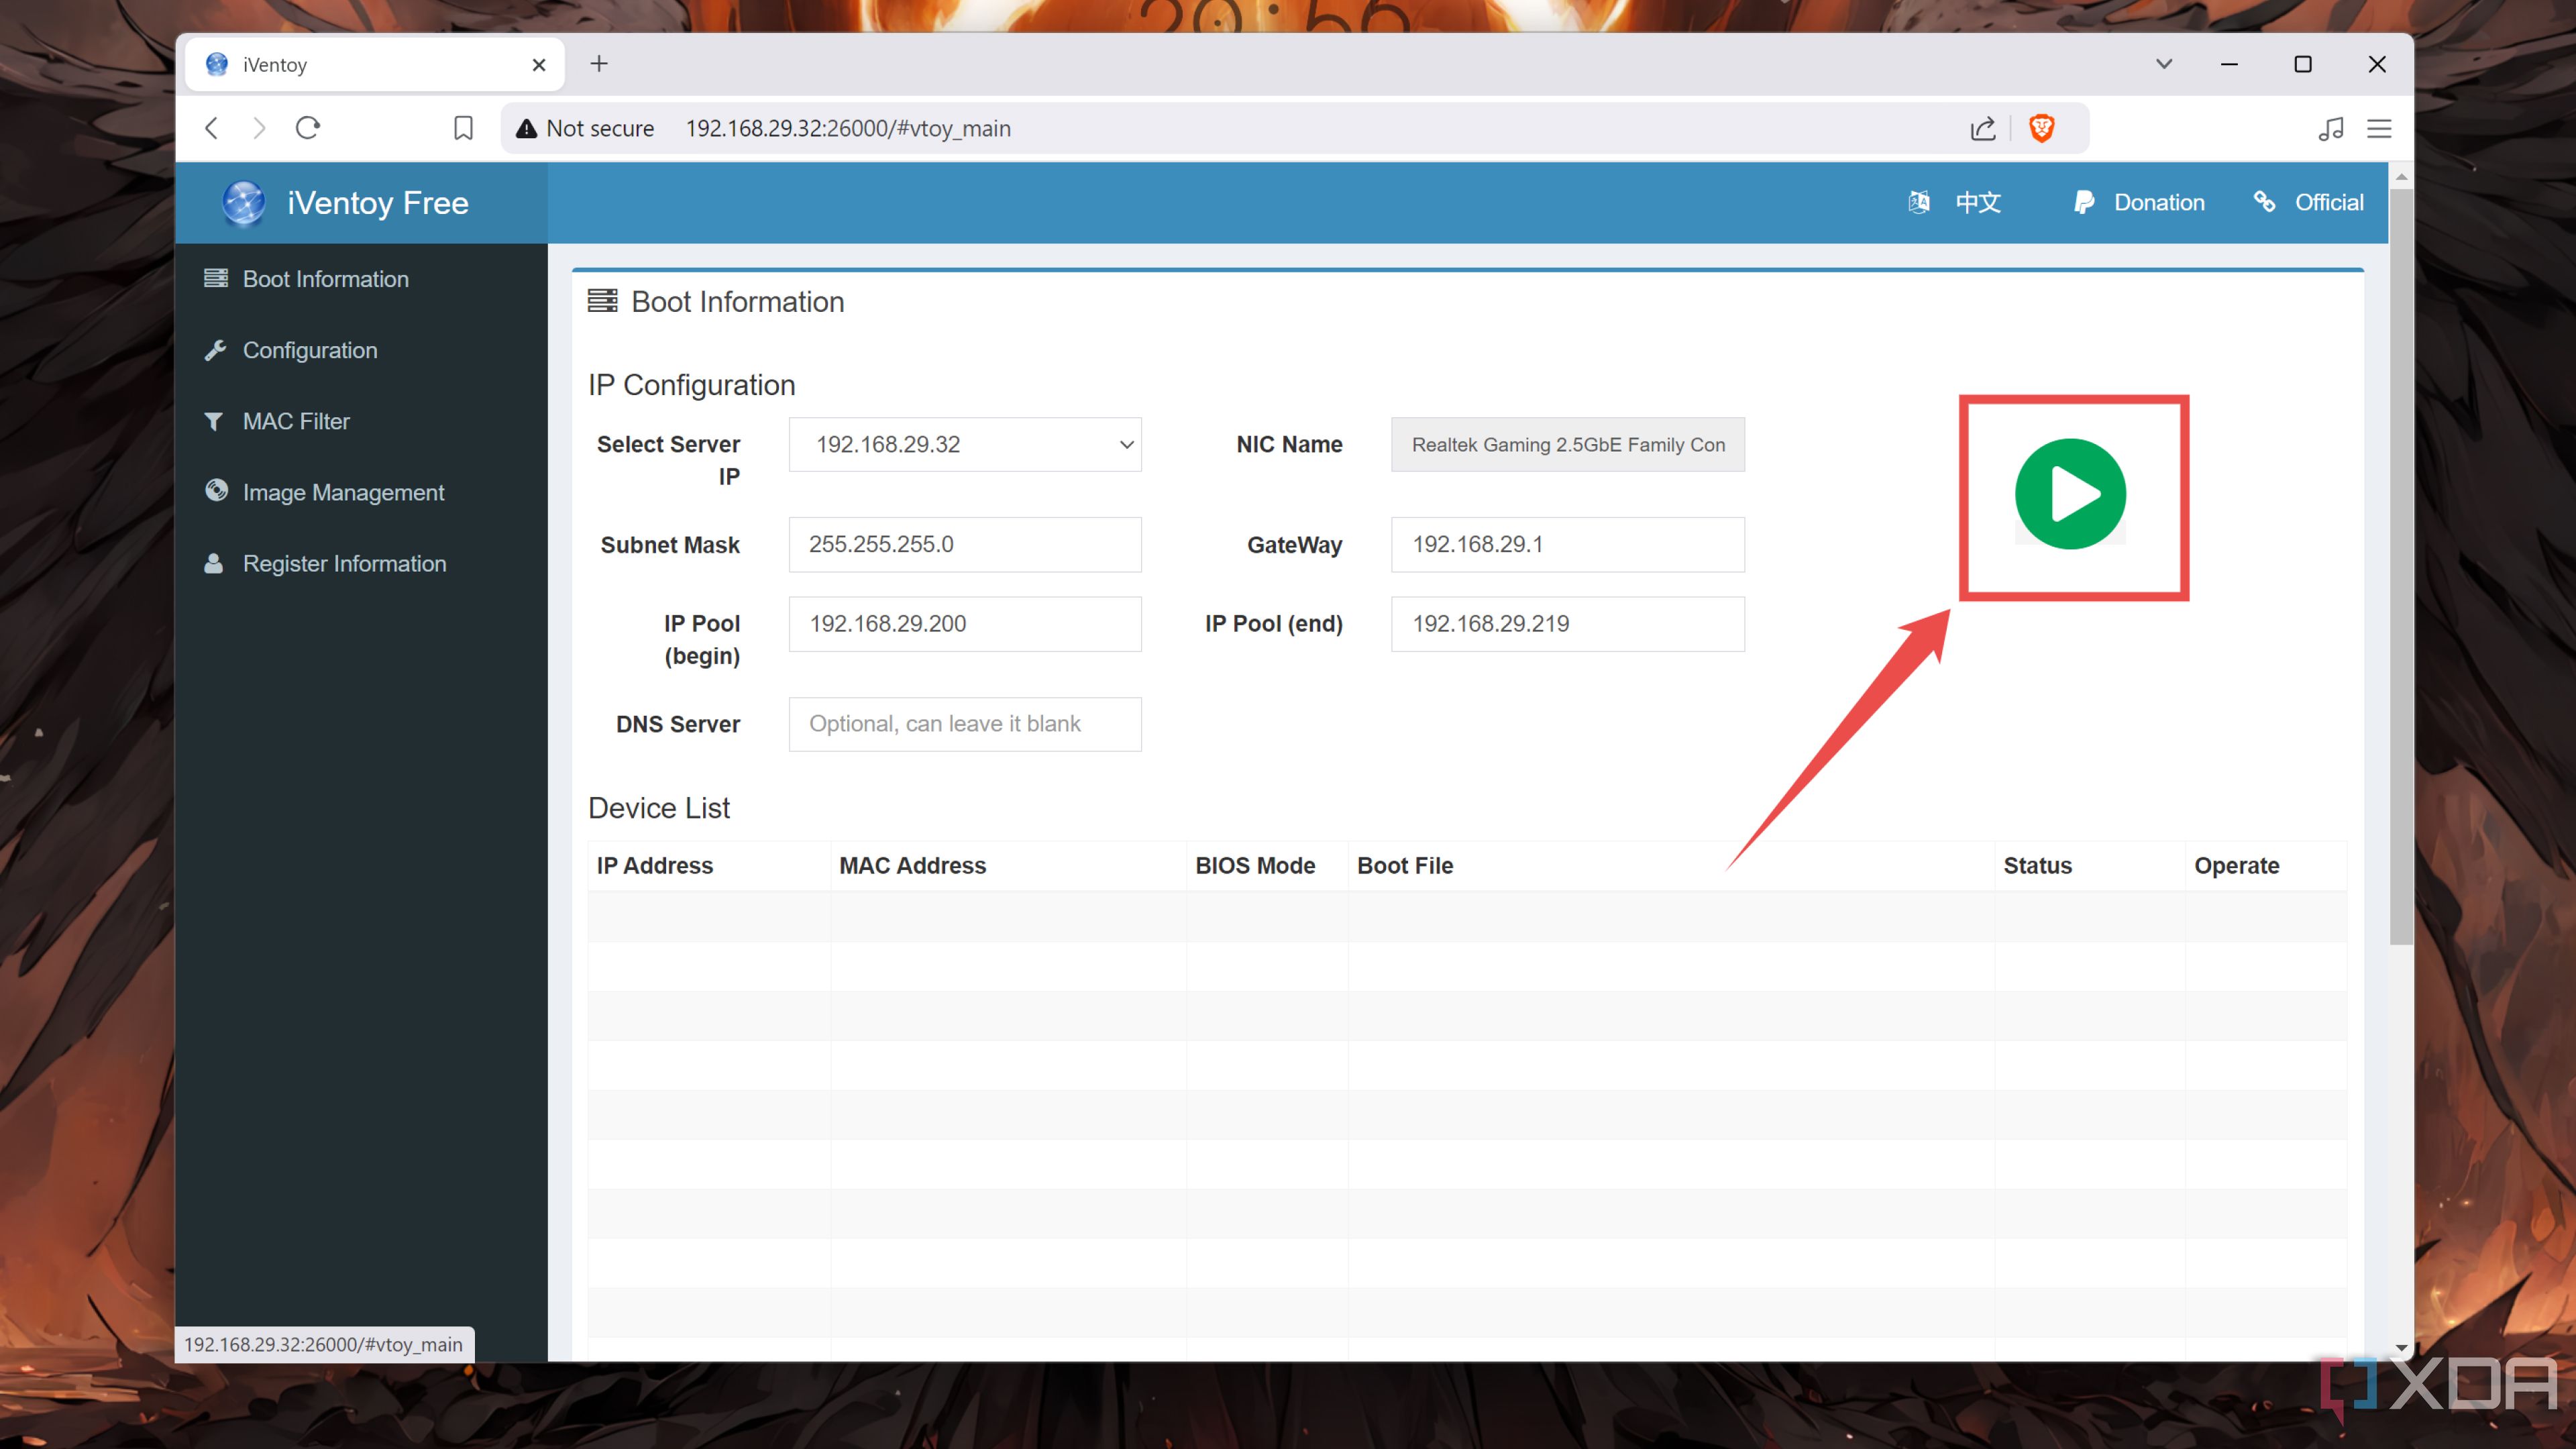
Make sure the IP address, NIC Name, Subnet Mask, and GateWay are properly configured before tapping the Start button.
-
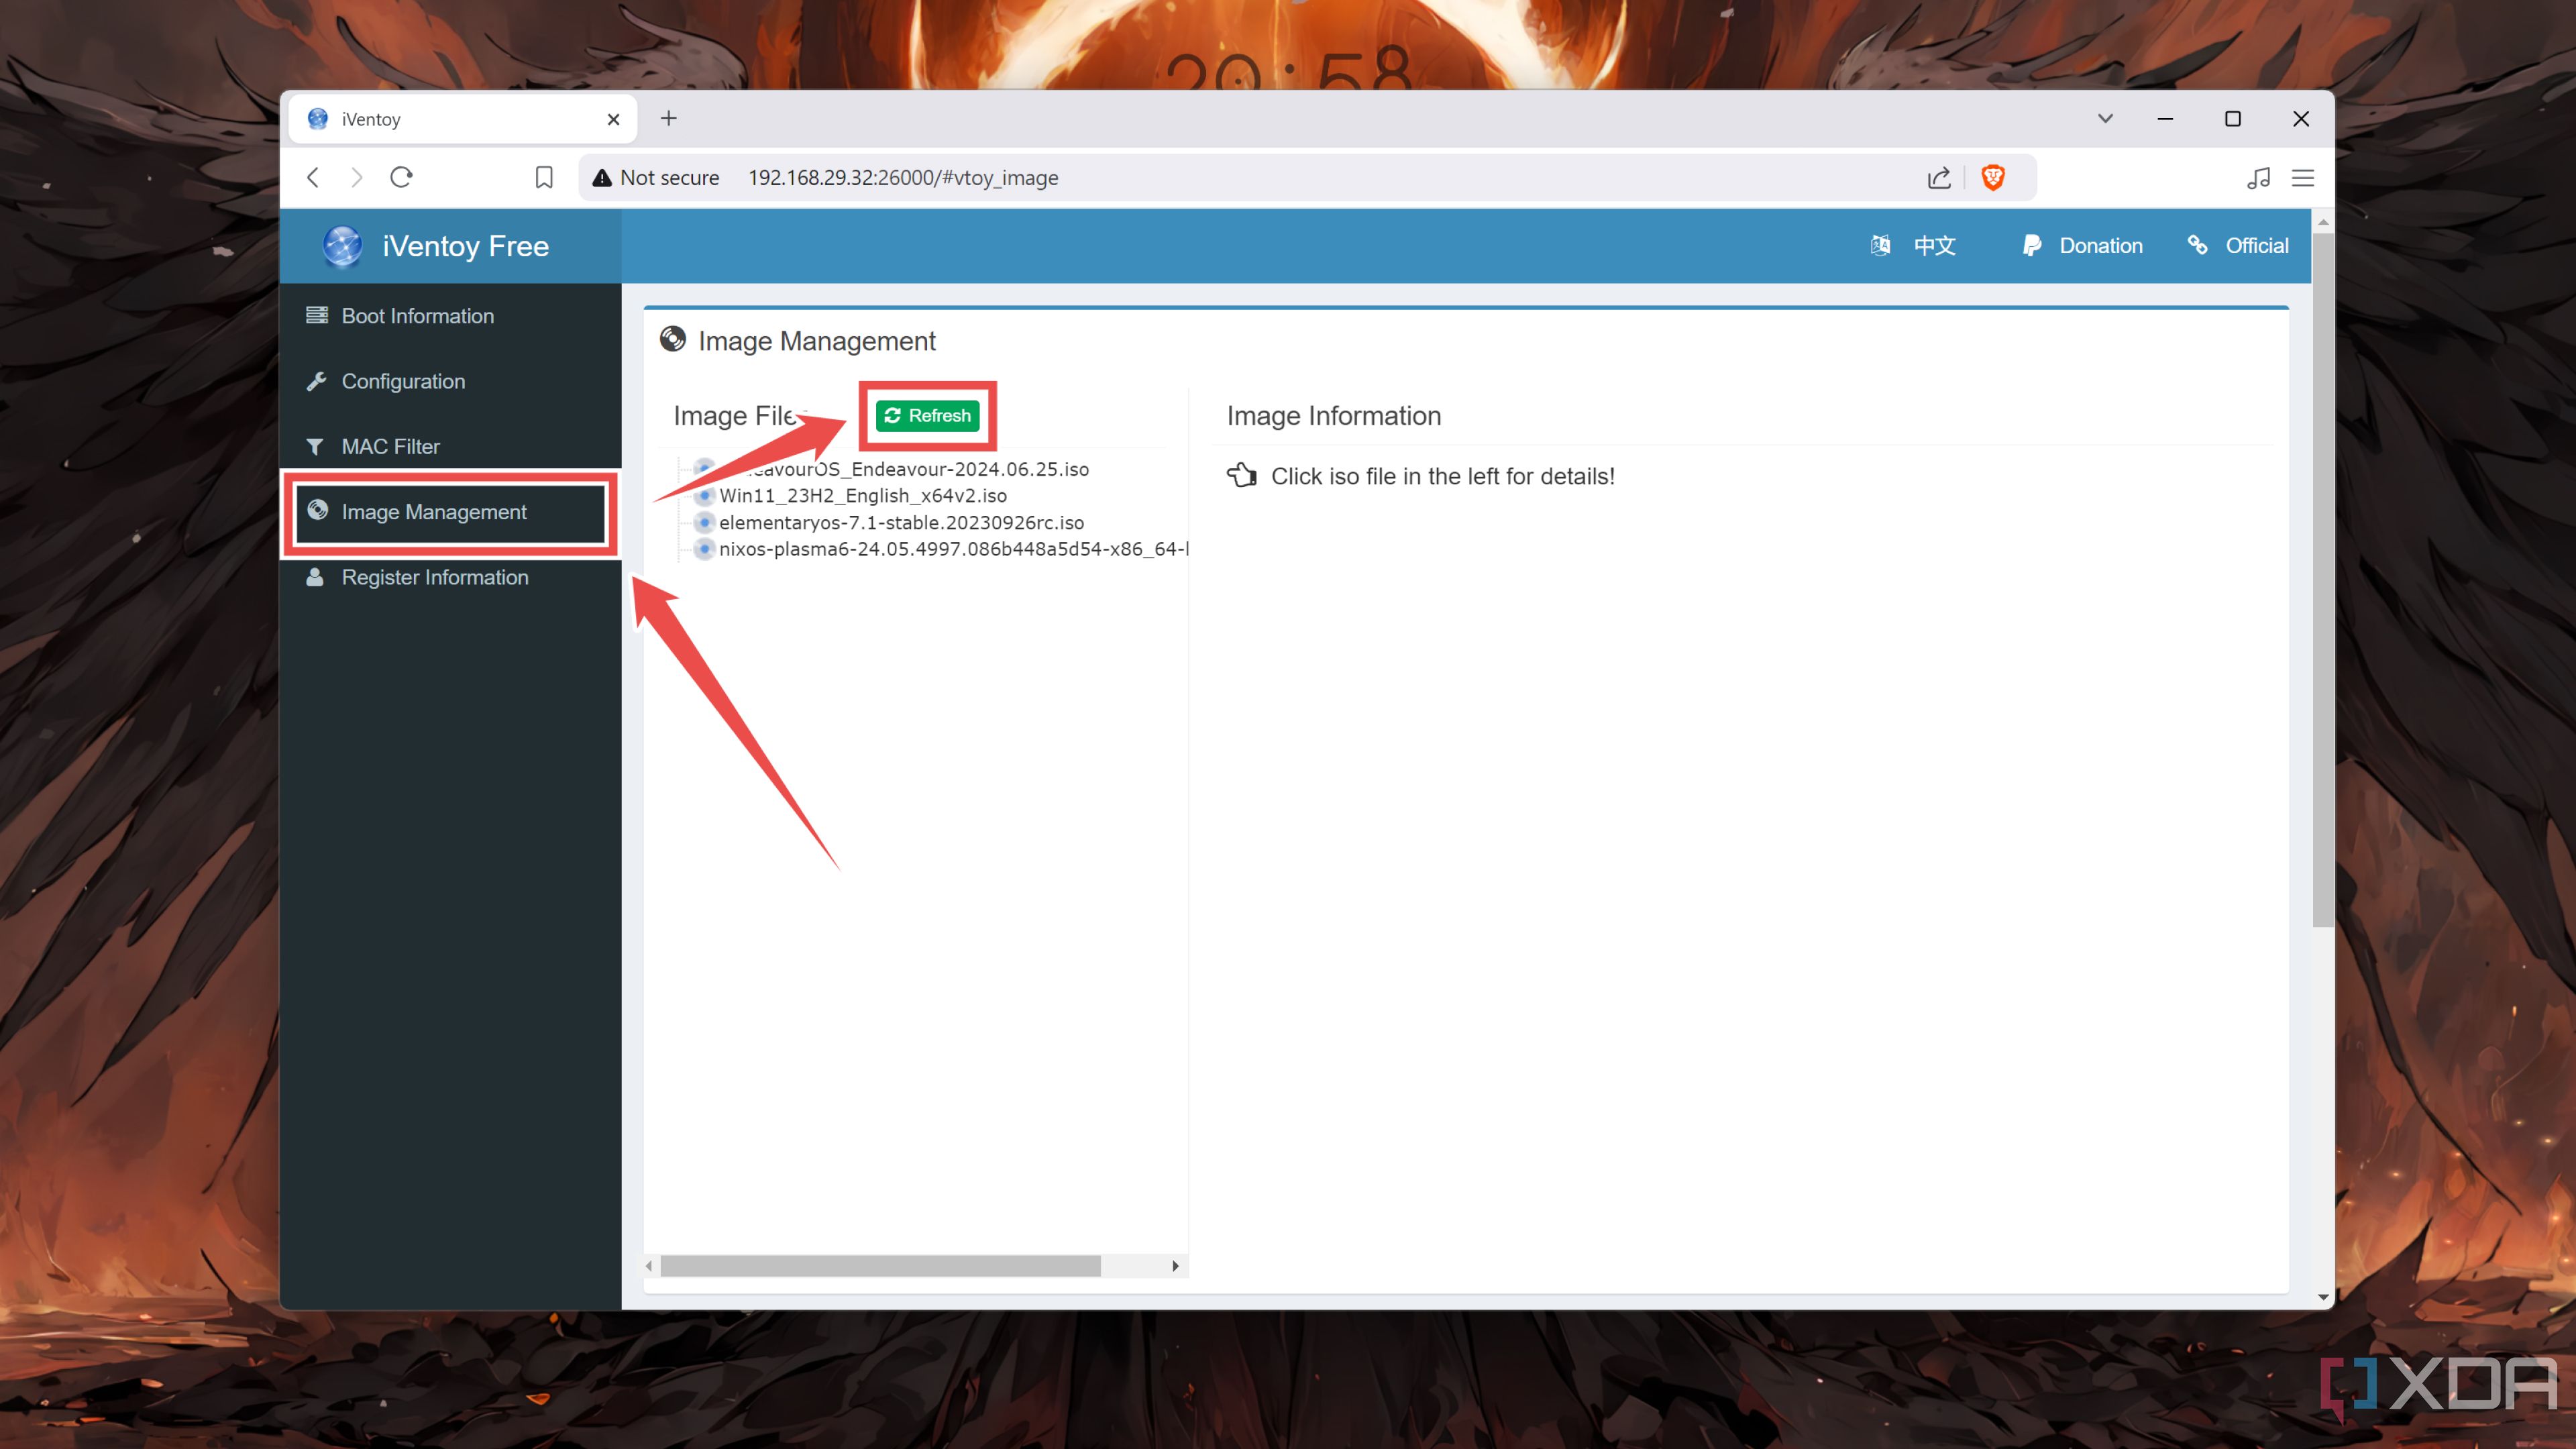
(Optional) If you want to add more images to the PXE server, you can copy them over to the iso folder and press Refresh inside the Image Management tab.


Connecting to the PXE server
Now that your PXE server is operational, you’ll need to modify the BIOS settings on your test machine to use it as the boot device. While the exact steps vary depending on your motherboard’s manufacturer, here’s a general outline of the process.
- Connect the test PC to the switch/router on the same network as the PXE machine using an Ethernet cable.
- Power on the system and mash the Del key as it boots up.
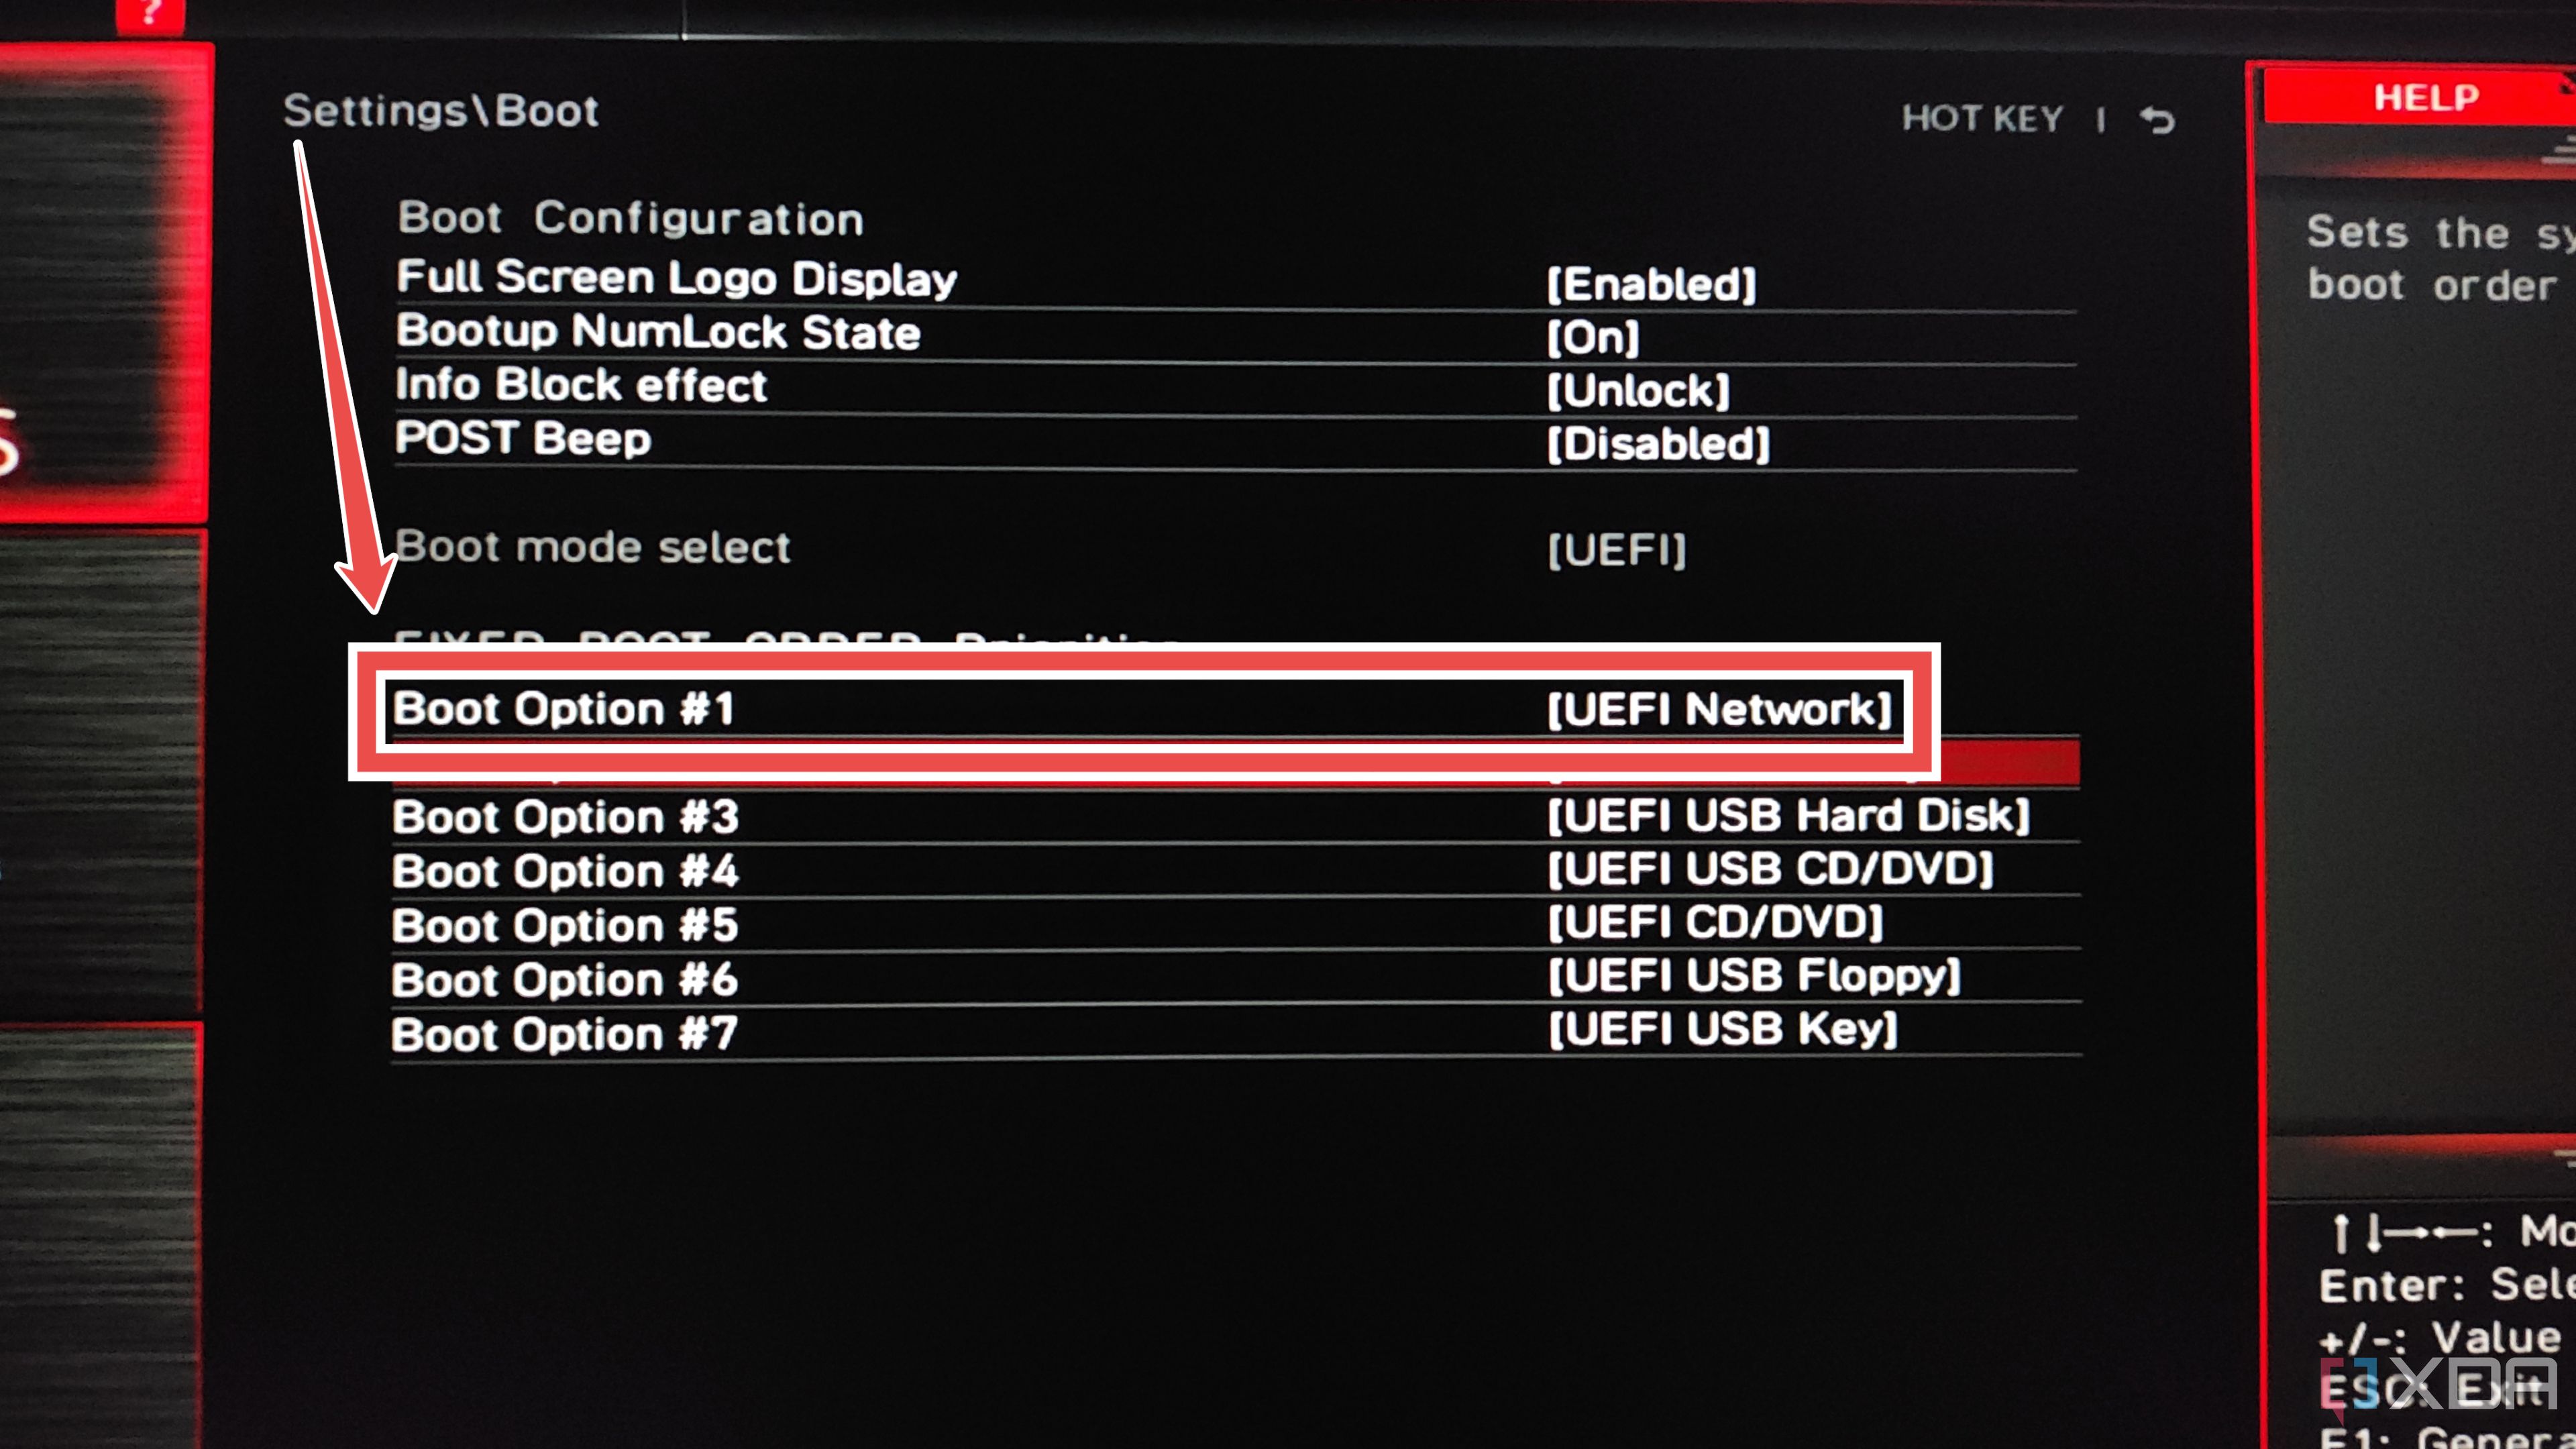
-
Open the Boot settings and set UEFI Network as Boot Option #1.
-
In case the PC doesn’t boot, head to the Integrated Peripherals tab within Advanced options and set the LAN Option ROM and Network stack to Enabled.
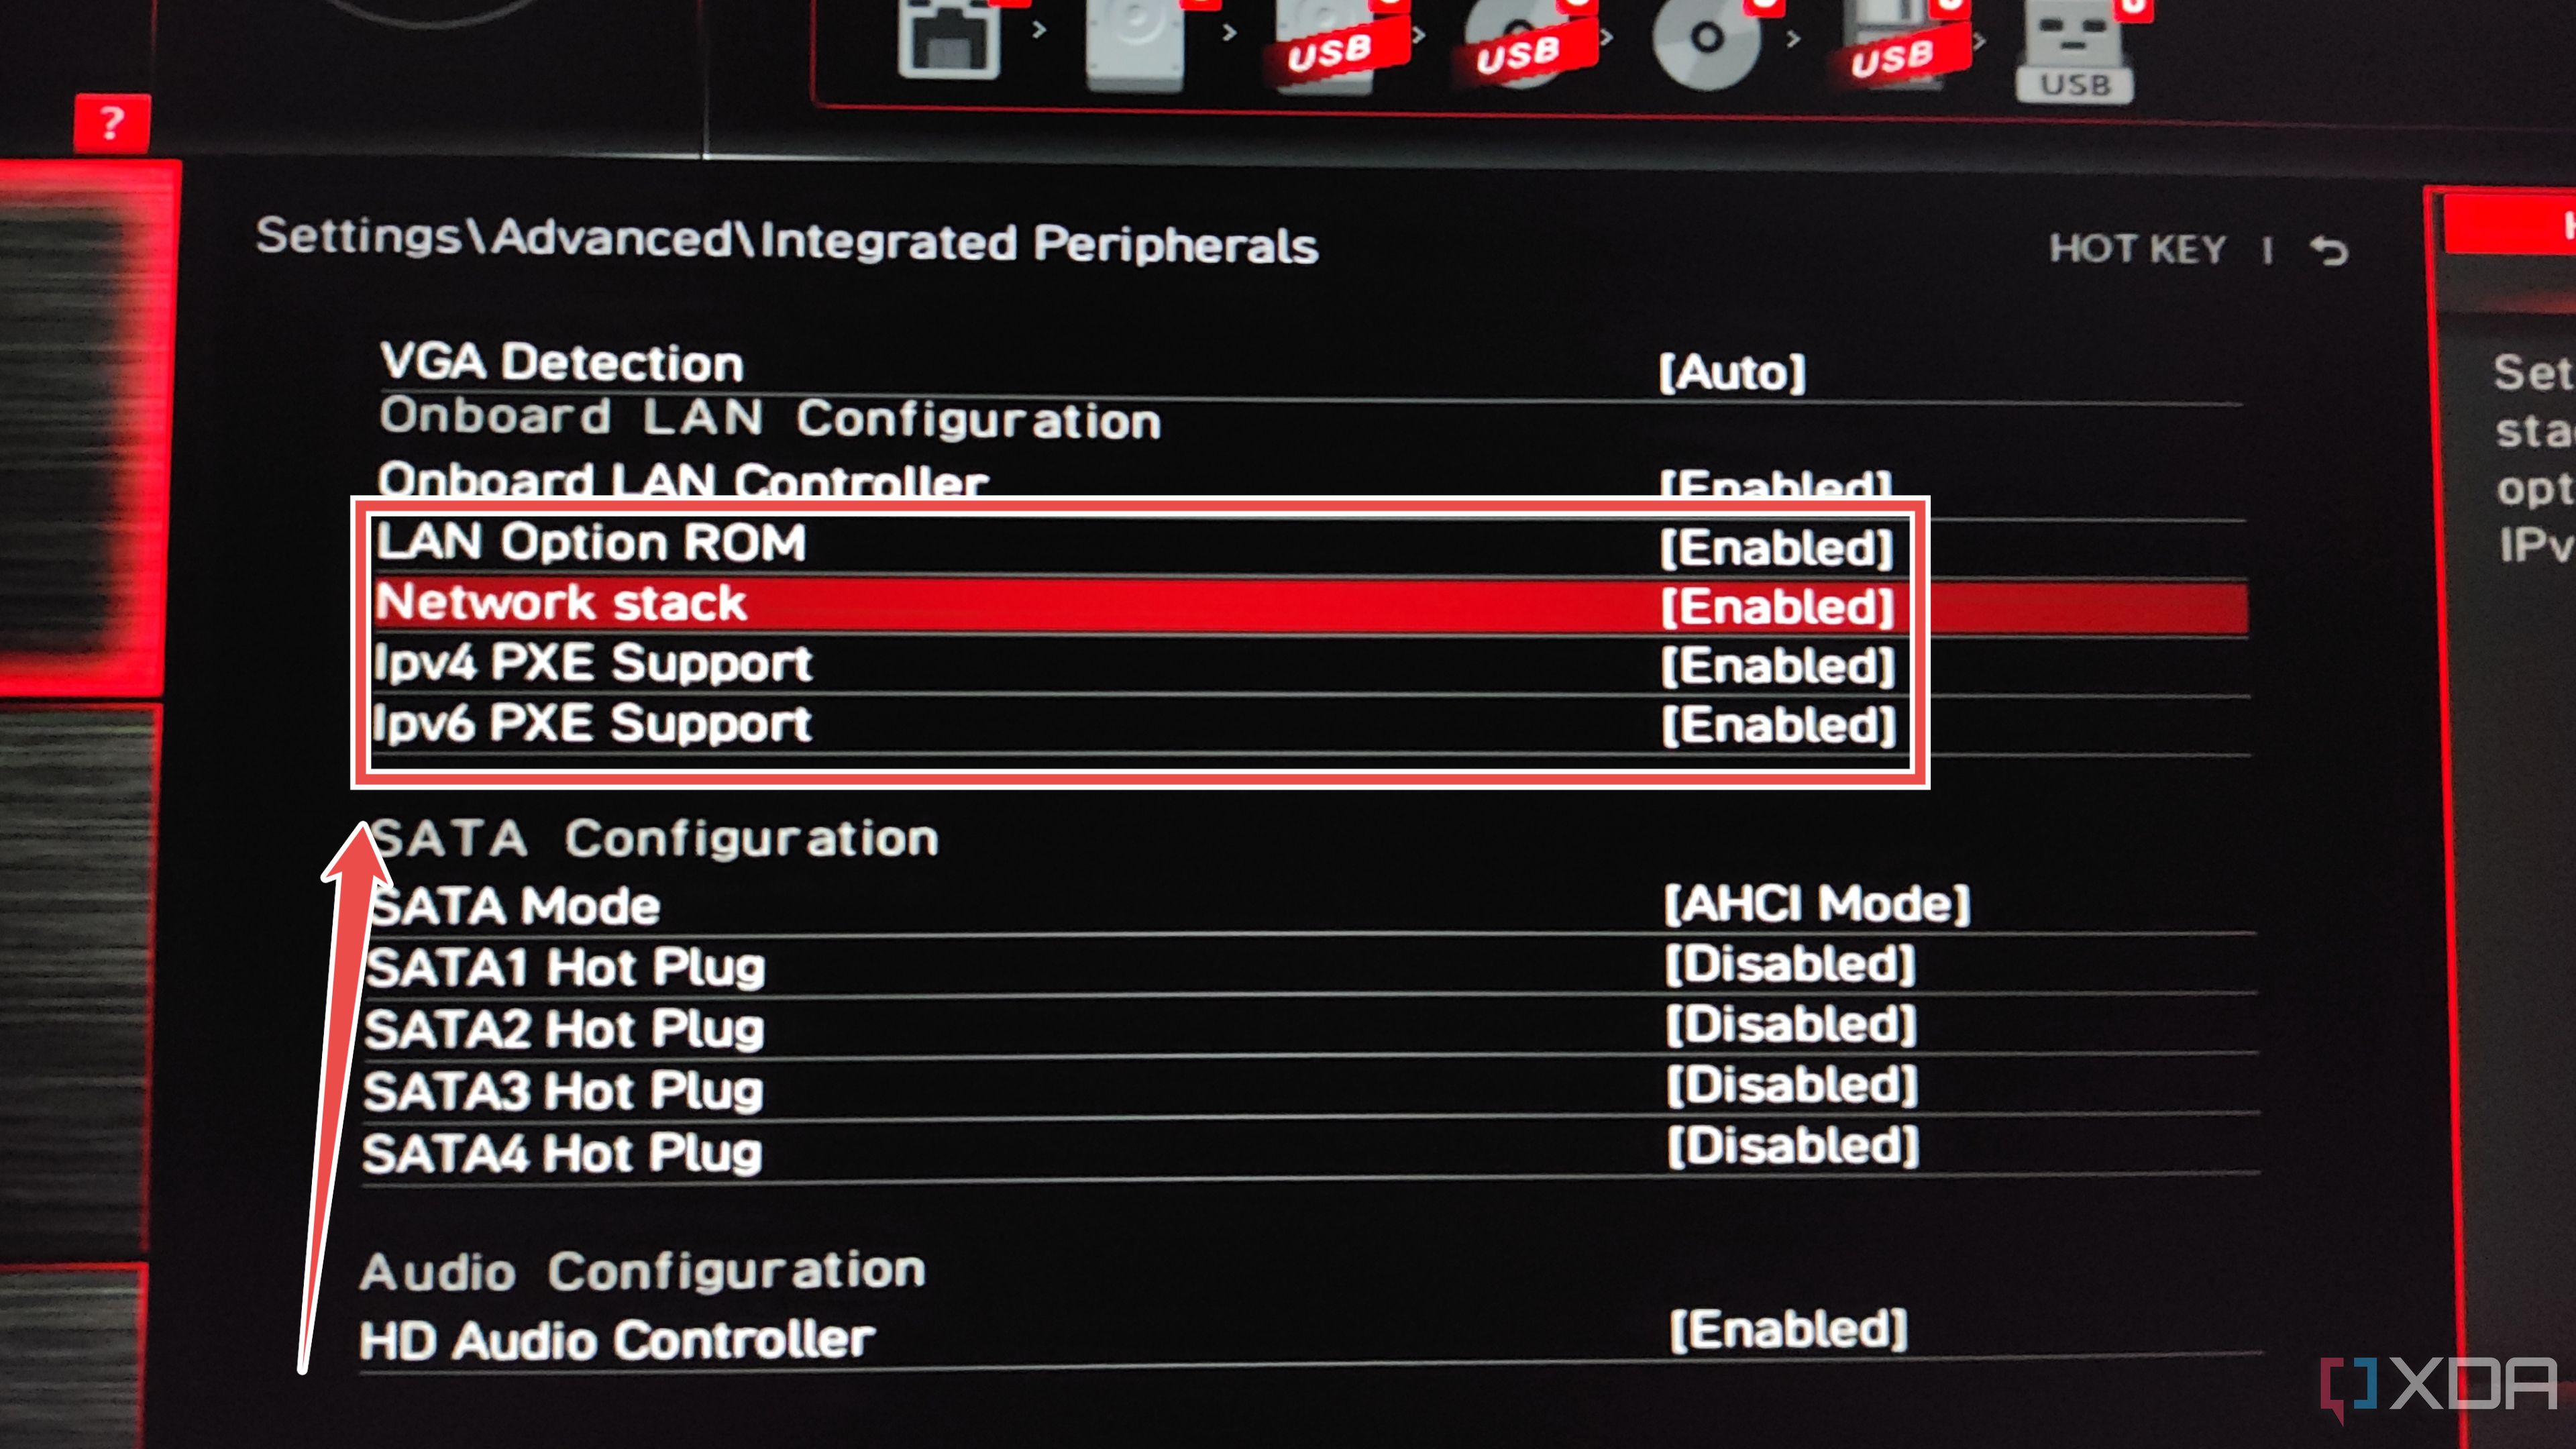
The IPv4 PXE Support and IPv6 PXE Support options will appear the moment you turn on the Network stack. Make sure both settings are set to Enabled before saving and exiting the BIOS.
- Your PC will launch the iVentoy Boot Environment, where you can choose between bootable OS images.


Say adios to bootable USB drives with your PXE server

Although I’ve used an actual PC for the iVentoy server, you can configure this tool inside a virtual machine running on your home lab. Likewise, you can also use the PXE environment as an ISO repository for your virtualization platform. That said, the free version of iVentoy supports a maximum of twenty clients and is incompatible with ARM64 systems, meaning you might want to upgrade to the Pro edition if you want more functionality out of your PXE server.
link


