How to maintain Windows 11 on your PC with its free tools
Remember when you first got your PC? It felt fast and responsive, right? And how about today? The chances are that it doesn’t feel anywhere near as speedy.
Thankfully, there are steps you can take to restore your computer to its former glory, without spending a penny. Windows itself offers free tools to help you maintain a PC or laptop running Windows 11.
Microsoft has included numerous ways to optimize and maintain the performance of your computer – you just need to know where to look. We reveal the utilities and options built directly into Windows to help keep your machine running smoothly.
1. Go to ‘This PC’
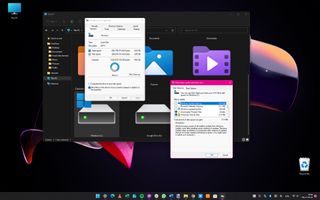
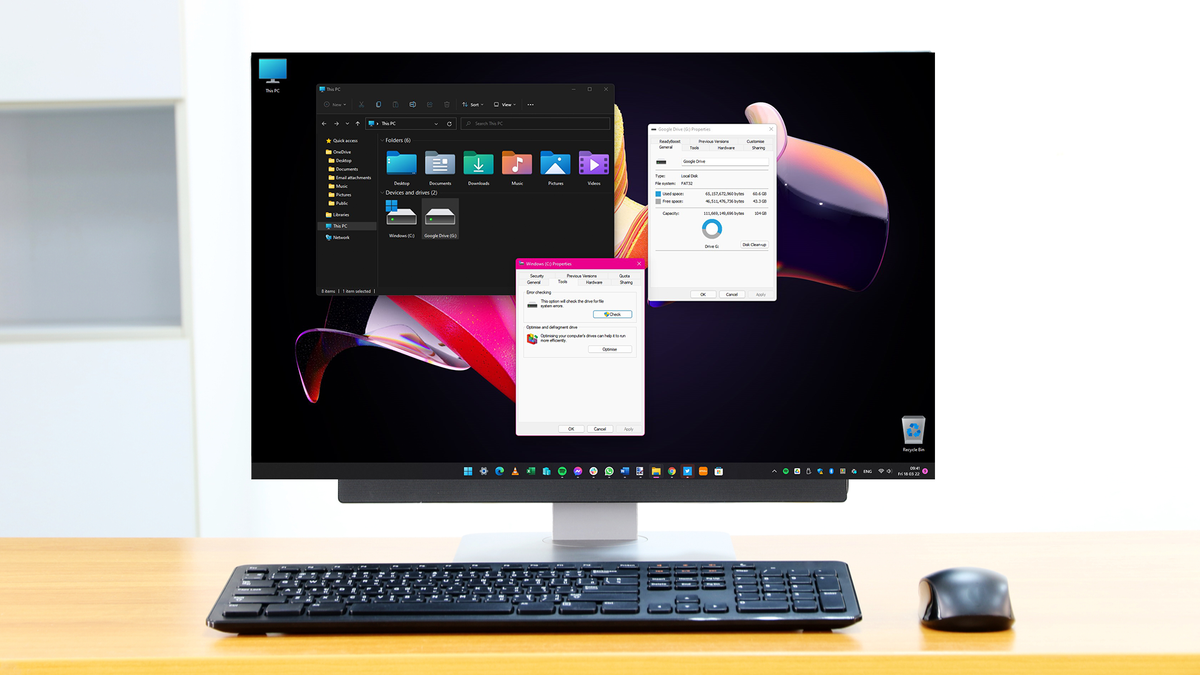
Whatever you use your computer for, Windows is making constant use of your hard drive. As such, it’s incredibly important to keep your storage devices in good shape. One of the first things to do is to perform a disk clean-up. Press Windows + E to open a File Explorer window, and click This PC in the left-hand navigation pane.
Right-click the icon representing one of your hard drives and select Properties; ensure you’re on the General tab. Click the Disk Clean-up button followed by Clean up system files. You can then use the check boxes to quickly delete lots of unnecessary files to reclaim space and use the More Options tab to remove old System Restore points.
2. Scanning your hard drive
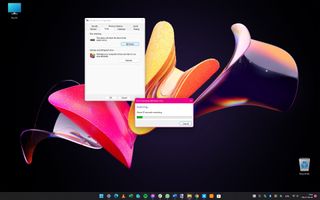
Modern hard drives are incredibly robust, but problems can crop up from time to time. You can check for drive errors by right-clicking on a drive icon in File Explorer, selecting Properties, and moving to the Tools tab.
Click the Check button followed by Scan drive and then sit back and wait for a bit while your drive is analyzed.
The scanning process can take some time; hopefully, once complete, you’ll be informed that there are no problems. But if issues are detected, Windows will offer advice about the steps you should take next.
3. Optimizing your storage
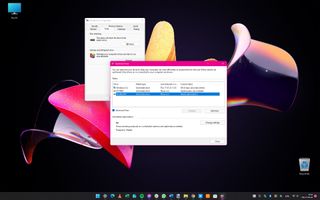
While the prevalence of solid-state drives means that fragmentation isn’t as pressing an issue as it used to be, drive optimization remains important. From the Tools tab of drive properties, click the Optimize button in the Optimize and defragment drive section.
If you then click the Optimize button, Windows will perform the necessary tasks to ensure peak performance. If you click the Advanced View button, you’ll be able to see more drives, each of which can be individually optimized using the same method.
4. Schedule a time for your storage to be optimized
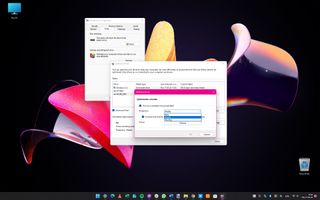
While you’re looking at drive optimization, it’s worth checking out scheduling options since these can be used to automate things in future. In the Scheduled optimization section of the Optimize Drives dialog, click the Change settings button and then make sure that the option labeled Run on a schedule (recommended) is checked.
You can use the drop-down menu to choose how frequently optimization should be performed, and click the Choose button to select the drives that should be included.
5. Checking Windows Update
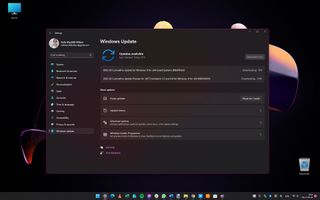
To some people the idea of installing updates may seem insignificant or unimportant, but this isn’t the case. In fact, the importance of keeping Windows 11 fully updated really can’t be overstated – it’s absolutely vital!
You should find that Windows is configured to automatically check for and download updates on a regular basis, but there’s nothing to stop you from manually checking from time to time as well.
This is particularly important if you’re experiencing problems with your computer at any time. Press Windows + I to open the Settings app, and head to the Windows Update section, from where you can then check for and install any updates.
6. Configure your PC’s graphical performance
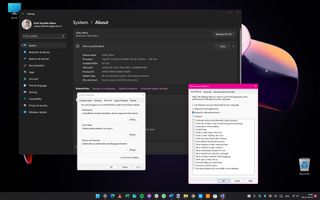
Windows 11 includes various special effects, which, while they may look nice, can slow down your computer, especially if it’s a slightly older machine. You can disable special effects in a few simple steps, starting by pressing Windows + I to open Settings.
Click the System section to the left, and then click About at the bottom of the right-hand pane. Click the Advanced system settings link and then click the Settings button in the Performance section of the Advanced tab. Select Adjust for best performance and click OK, followed by OK.
7. Changing your battery settings
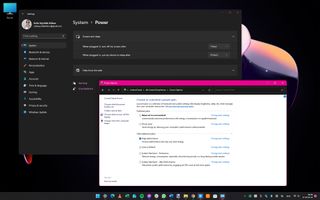
Windows 11, like its predecessors, offers the ability to balance your computer’s power consumption with its performance. When you’re running your laptop via the battery, power consumption is an important consideration; but on a desktop PC or when connected to the mains, performance is much more important.
Click the Start button, type Power plan and click the Change power plan option that appears in search results. Expand the Show additional plans section and then select the High performance option. You can click Change plan settings to customize the plan if you like, but the default settings should be fine.
8. Using Task Manager
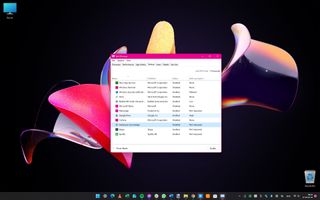
Lots of software you install will configure itself to launch automatically when Windows starts, and while this can often be useful, over time it can seriously slow down your computer. It’s worth checking what’s running at startup, disabling anything you don’t really need.
Press Ctrl + Alt + Del and select Task Manager from the menu that appears. Move to the Startup tab of Task Manager and look through the list of apps. If there are any listed that you don’t want launched with Windows, right-click them and select Disable. When you’ve done this for all unnecessary startup apps, restart your computer.
9. Checking the Microsoft Store for updates
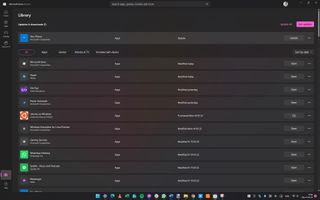
Just as it is important to keep Windows itself up to date, the same is true of the other software you have installed. For software that you’ve installed from the Microsoft Store, you can simply launch the Store app, move to the Library section, and click the Update all or Get updates button.
Uninstall and update apps. When it comes to software that you didn’t obtain from the Store, you’ll have to check in individual apps to determine how the update process works. Some apps will handle things automatically, with others you’ll need to manually check for updates.
10. If in doubt – restart your PC
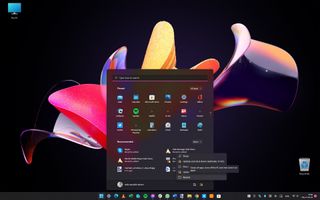
It has become increasingly common to leave computers in sleep mode rather than shutting them down when they’re not in use. While this helps to speed up startup times, it can also introduce issues over time. If you find that your machine is feeling a bit sluggish, just select the Restart option from the power section of the Start menu.
You’ll flush out memory, close down unnecessary apps, and much more – all with one simple action. So, don’t forget: it’s a good idea to give Windows 11 a restart from time to time, so it has something of a clean start.
Keeping your PC in healthy shape
Maintaining a PC is similar to keeping a bicycle or a car running smoothly – and if you didn’t carry out maintenance either of those, they could be prone to running slower than intended, or not running at all.
Try to spend one evening a week looking at files and apps that you don’t use anymore. That’s a great first step to help you optimize your storage. Then, follow the above steps every week to ensure that your PC is up to date.
link

